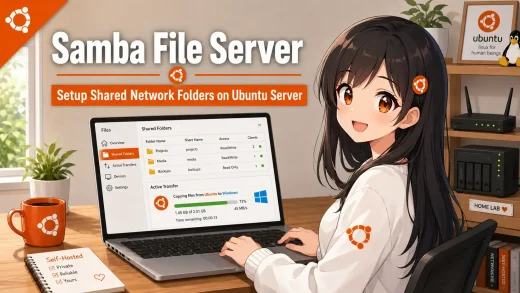
To share Ubuntu files with Windows, the most reliable methods are using Nautilus GUI sharing, manual Samba server setup, a temporary Python HTTP server, or secure SFTP transfers. These options allow you to access shared documents, media, and folders from a Windows PC over your local network. This guide walks you through setting up each method step-by-step.
With Windows
A complete step-by-step guide to configuring folder sharing on Ubuntu Desktop, mounting shared directories in Windows File Explorer, and using lightweight terminal transfer tools.
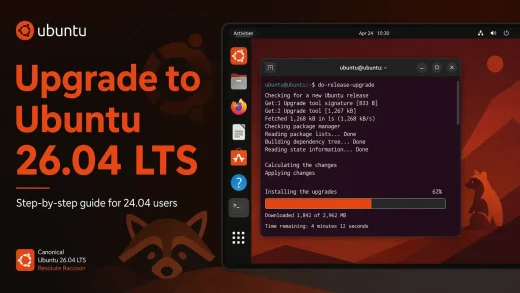
Sharing folders between Linux and Windows used to require complex command-line configuration. On Ubuntu 26.04 LTS, you can share folders straight from your file manager with just a few clicks. This guide covers the right-click GUI method, manual Samba configurations, Python web server transfers, and secure SFTP setups.
Comparing the 4 File Sharing Methods
Pick the method that best fits your workflow. If you want a permanent network drive, choose GUI Sharing or Samba. For quick, one-off file copies, Python or SFTP is much faster.
| Method | Best For | Security | Effort |
|---|---|---|---|
| GUI Sharing | Beginners looking to share personal folders from Files (Nautilus) | Medium (Password or Guest option) | Low |
| Manual Samba | Home servers, headless setups, and custom directory mounts | High (User/group restriction rules) | Medium |
| Python HTTP | Quick, temporary, one-off file downloads via web browsers | Low (Public read-only, no credentials) | Very Low |
| SFTP / SSH | Developers and terminal users who need fully encrypted copying | High (Encrypted SSH credentials) | Medium |
Method 1. Right-Click GUI Folder Sharing (Nautilus Share)
The easiest way to share folders on Ubuntu Desktop is using the built-in file manager context menu. Before using this feature, we must install the sharing extension and register a network access password.
Open a terminal (Ctrl+Alt+T) and run the following command to install the required sharing modules:
sudo apt update
sudo apt install samba nautilus-share -y
For security, add your user profile to the local sharing group and create a separate sharing password:
sudo usermod -aG sambashare $USER
sudo smbpasswd -a $USER
Type in a network password when prompted. You can use your normal login password or a different one.
Restart the file manager session so the context menu options load:
nautilus -q
Open the Files app, right-click the folder you want to share, and select Local Network Share. Adjust these settings in the options dialog:
• Share this folder: Check this box to activate network sharing.
• Allow others to create and delete files: Check this box if you want Windows to have write access.
• Guest access: Check this if you want anyone on the network to access it without a password.
Click Create Share (or Modify Share) to finalize. The folder icon will change to display a network sharing symbol.
Method 2. Command-Line Samba Configuration
If you are working on a server without a monitor (a headless machine) or want finer control over user group permissions, you can define your share rules directly in the Samba configuration file. This is also how you configure directory mapping on a dedicated home storage server.
Open the central Samba configuration file in your terminal text editor:
sudo nano /etc/samba/smb.conf
Scroll to the bottom of the file and paste the following configuration block. Replace YOUR_USERNAME with your actual Ubuntu account name:
[UbuntuShare]
   comment = Network Shared Directory
   path = /home/YOUR_USERNAME/shared
   browsable = yes
   writable = yes
   read only = no
   guest ok = no
   valid users = YOUR_USERNAME
   create mask = 0644
   directory mask = 0755
Press Ctrl+O, then Enter to save your edits. Press Ctrl+X to exit the nano editor.
Ensure the shared directory exists and register your user password in the Samba database:
mkdir -p ~/shared
sudo smbpasswd -a YOUR_USERNAME
Restart the sharing service to load the changes, and adjust the local firewall rules to allow client connections:
sudo systemctl restart smbd
sudo ufw allow samba
If you want to configure public folders or set up a dedicated Linux machine as a central network storage system, check out our full [Samba File Server Setup Guide](https://www.ubuntufree.com/how-to-setup-ubuntu-file-server-with-samba/) for deep configuration and troubleshooting advice.
Method 3. Quick Ad-Hoc Transfers via Python HTTP Server
If you do not want to install permanent service utilities or configure user access parameters just to copy a single file, you can spin up a temporary web server. Python is preinstalled on Ubuntu 26.04 and provides a built-in module for web transfers.
In your terminal, navigate (cd) to the directory containing the files you want to copy, and run this command:
python3 -m http.server 8000
This starts a local read-only web server listing files in the terminal folder. It listens on port 8000.
Open another terminal window or tab and find your local network IP address:
ip route get 1
Look for the IP address listed after src (for example, 192.168.1.50).
On your Windows machine, open any web browser (such as Microsoft Edge or Google Chrome) and navigate to your Ubuntu IP address followed by port 8000:
http://YOUR_UBUNTU_IP:8000
You will see a directory listing of the Ubuntu folder. Simply click any file link to download it directly onto your Windows PC. Once you are finished, go back to your Ubuntu terminal and press Ctrl+C to terminate the Python server.
Method 4. Secure File Transfers via SFTP
If you already manage your Ubuntu machine remotely using SSH, you can utilize the Secure File Transfer Protocol (SFTP). This is highly secure, encrypted, and does not require configuring Samba share rules or folder permissions.
If you haven’t enabled SSH access on your Ubuntu machine, run these commands to install and start the service:
sudo apt update
sudo apt install openssh-server -y
sudo systemctl enable --now ssh
sudo ufw allow ssh
To share files graphically, download and install a trusted client on your Windows system, such as WinSCP or FileZilla. Open the client and fill out the connection manager profile:
• Protocol: Select SFTP.
• Host Name: Enter your Ubuntu local IP address.
• Port: Use default port 22.
• Username & Password: Enter your regular Ubuntu login details.
Click Connect. You will see a dual-pane window showing your Windows files on the left and Ubuntu files on the right. Simply drag and drop files to copy them.
You can also copy files straight from Windows PowerShell or Command Prompt using the built-in scp utility:
# Copy a file from Ubuntu to your Windows Downloads folder
scp YOUR_UBUNTU_USERNAME@YOUR_UBUNTU_IP:/path/to/ubuntu/file.txt C:\Users\YOUR_WINDOWS_USERNAME\Downloads\

# Copy a file from Windows to your Ubuntu home folder
scp C:\Users\YOUR_WINDOWS_USERNAME\Documents\data.zip YOUR_UBUNTU_USERNAME@YOUR_UBUNTU_IP:~/
How to Access Samba Shares in Windows
Once you have configured folder sharing on Ubuntu (using Method 1 or Method 2), use these steps to mount the shared folders directly in Windows File Explorer.
On your Windows keyboard, press the Win+R keys to open the Run box.
Type double backslashes followed by your Ubuntu local IP address and the shared name. For example:
\\192.168.1.50\UbuntuShare
Press Enter or click OK.
A network login box will appear. Enter your Ubuntu username and the Samba sharing password you set up earlier.
Check the box Remember my credentials if you want Windows to connect automatically in the future, then click OK.
If you plan to use this folder frequently, you can pin it to File Explorer or map it as a persistent drive letter (like Z:):
Right-click the shared folder in the Explorer network window, and select Map network drive. Select a drive letter, check Reconnect at sign-in, and click Finish.
If your Windows machine reports that it cannot connect or find the network path, run through these quick server verification commands:
sudo systemctl status smbd
If it is stopped, start it by running `sudo systemctl start smbd`.
sudo ufw status verbose
Ensure `Samba` or port `445` (TCP/UDP) is allowed. If not, open it: `sudo ufw allow samba`.
sudo tail -n 20 /var/log/samba/log.smbd
This prints the end of the system log, detailing rejected connections, credential errors, or local write blocks.
Frequently Asked Questions
Why can’t I see my Ubuntu shared folder on Windows?
This usually happens because the firewall is blocking traffic or the Samba service is not running. Ensure you allowed Samba through UFW by running sudo ufw allow samba, and verify that the Samba service is active by running sudo systemctl status smbd.
Do I need a separate password for Samba file sharing?
Yes. Samba does not use your regular Ubuntu login password directly. You must set a Samba password for your user by running the sudo smbpasswd -a username command. This is the password you will enter on Windows when connecting to the share.
How do I find my Ubuntu local IP address?
Open your terminal on Ubuntu and run the ip route get 1 command or check the ip addr output. Look for the address next to src (such as 192.168.1.50). This is the address you will enter on Windows to access the files.
Can I share folders without setting a password?
Yes, you can enable guest sharing. In the GUI sharing settings, check the Guest Access option. In the manual Samba configuration, add guest ok = yes and force user = nobody to the share block. Anyone on your local network will be able to access the files without logging in.
Why am I getting a permission denied error when Windows tries to write files?
This happens when the underlying Linux file permissions do not allow writing. If you want Windows users to write files, make sure the Linux folder permissions allow group or public writes (such as using chmod 775 or 777), and that valid users have write access in your smb.conf.
Can I share files over the internet?
You should not expose Samba or port 445 directly to the internet as it is insecure. To share files remotely, first connect both devices to a secure virtual private network (VPN) like WireGuard, then access the share over the VPN tunnel.
More Ubuntu guides: How to Install Ubuntu Server · Samba File Server Setup · Automatic Security Updates · Ubuntu Keyboard Shortcuts · Ubuntu 26.04 New Features · Upgrade to Ubuntu 26.04 LTS