The best open source AI tools for Ubuntu include Ollama, a CLI tool that manages and runs LLMs locally; ComfyUI, a node-based image generation app for Stable Diffusion and FLUX; Continue.dev, an AI coding assistant for VS Code and JetBrains; and PyTorch, the main framework used to build and fine-tune modern AI models.
This guide covers 14 open source tools across four practical categories: running AI locally, generating images, writing code with AI help, and building machine learning projects. Each tool is actively maintained as of May 2026, works on Ubuntu 24.04 or 26.04, and includes an install command so you can test it without hunting through documentation.
🌟 Quick Picks at a Glance
- Best local LLM runner: Ollama – one-line install, 100+ models, works on any hardware
- Best for beginners (no terminal): GPT4All – desktop app, totally offline, zero setup
- Best AI image generation: ComfyUI – faster, more flexible, node-based workflows
- Best AI image generation (artists): InvokeAI – clean UI, structured workflow, FLUX support
- Best coding assistant (IDE): Continue.dev – VS Code and JetBrains, works with local Ollama
- Best coding assistant (terminal): Aider – git-integrated, edits multiple files, any LLM
- Best ML framework: PyTorch – dominant in research and production since 2023
- Best model access layer: Hugging Face Transformers – 500k+ models, one import away
If you are new to local AI on Ubuntu and just want a working setup as fast as possible, start with these three tools in order. You do not need to read the whole guide first.
- Ollama – installs in one command, runs LLMs as a local service
- Open WebUI – connects to Ollama and gives you a full browser-based chat interface
- Continue.dev – installs as a VS Code extension and gives you AI coding assistance powered by your local Ollama models
The three tools work together out of the box. Total setup time is under 15 minutes on a machine with a decent GPU. All three are free, open source, and run entirely offline after the initial model download.
🧠 Run AI Locally
These tools let you download and run large language models on your own Ubuntu machine. No cloud account, no API key, no usage limits. Your prompts and outputs stay entirely on your hardware.
Best For: Anyone who wants to run LLMs locally with the least amount of setup
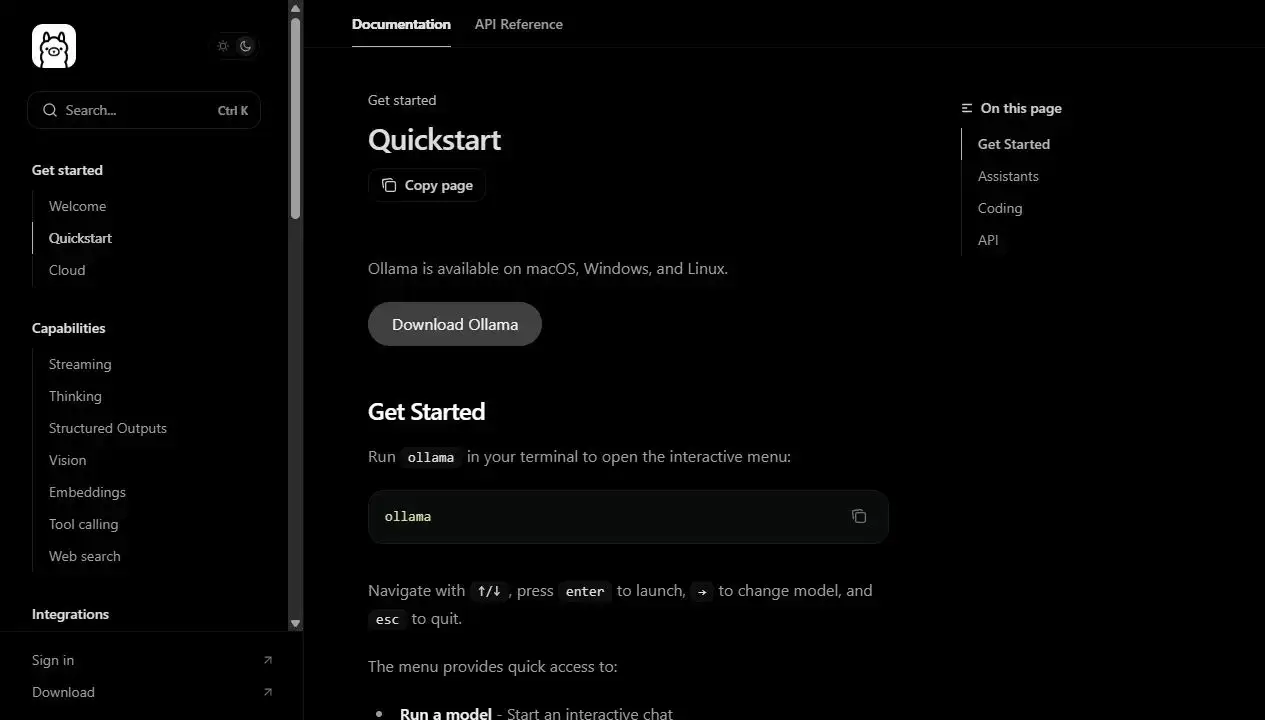
Why Choose It? Ollama is the fastest path from a fresh Ubuntu install to a running language model. One command installs the service and sets up the API. From there, pulling a model is as simple as typing a name. Ollama handles NVIDIA and AMD GPU acceleration automatically, and it exposes a local REST API on port 11434 that other tools – including Open WebUI, Continue.dev, and Aider – can connect to.
- Model library: Llama 3.3, Mistral, Gemma 3, Qwen 3, Phi-4, DeepSeek, and 100+ more
- GPU support: NVIDIA (CUDA), AMD (ROCm), Apple Silicon – auto-detected on install
- CPU fallback: Runs on CPU-only machines, just slower
- API compatible: OpenAI-compatible REST API – drop-in for many existing tools
- Pairs with: Open WebUI (browser UI), Continue.dev (VS Code), Aider (terminal)
Quick Tip: After install, run ollama pull llama3.2 to grab a solid general-purpose model. Use ollama list to see what you have downloaded and ollama run llama3.2 to chat in the terminal.
Install Command:
Best For: Ubuntu users who want offline AI chat with no terminal and no setup
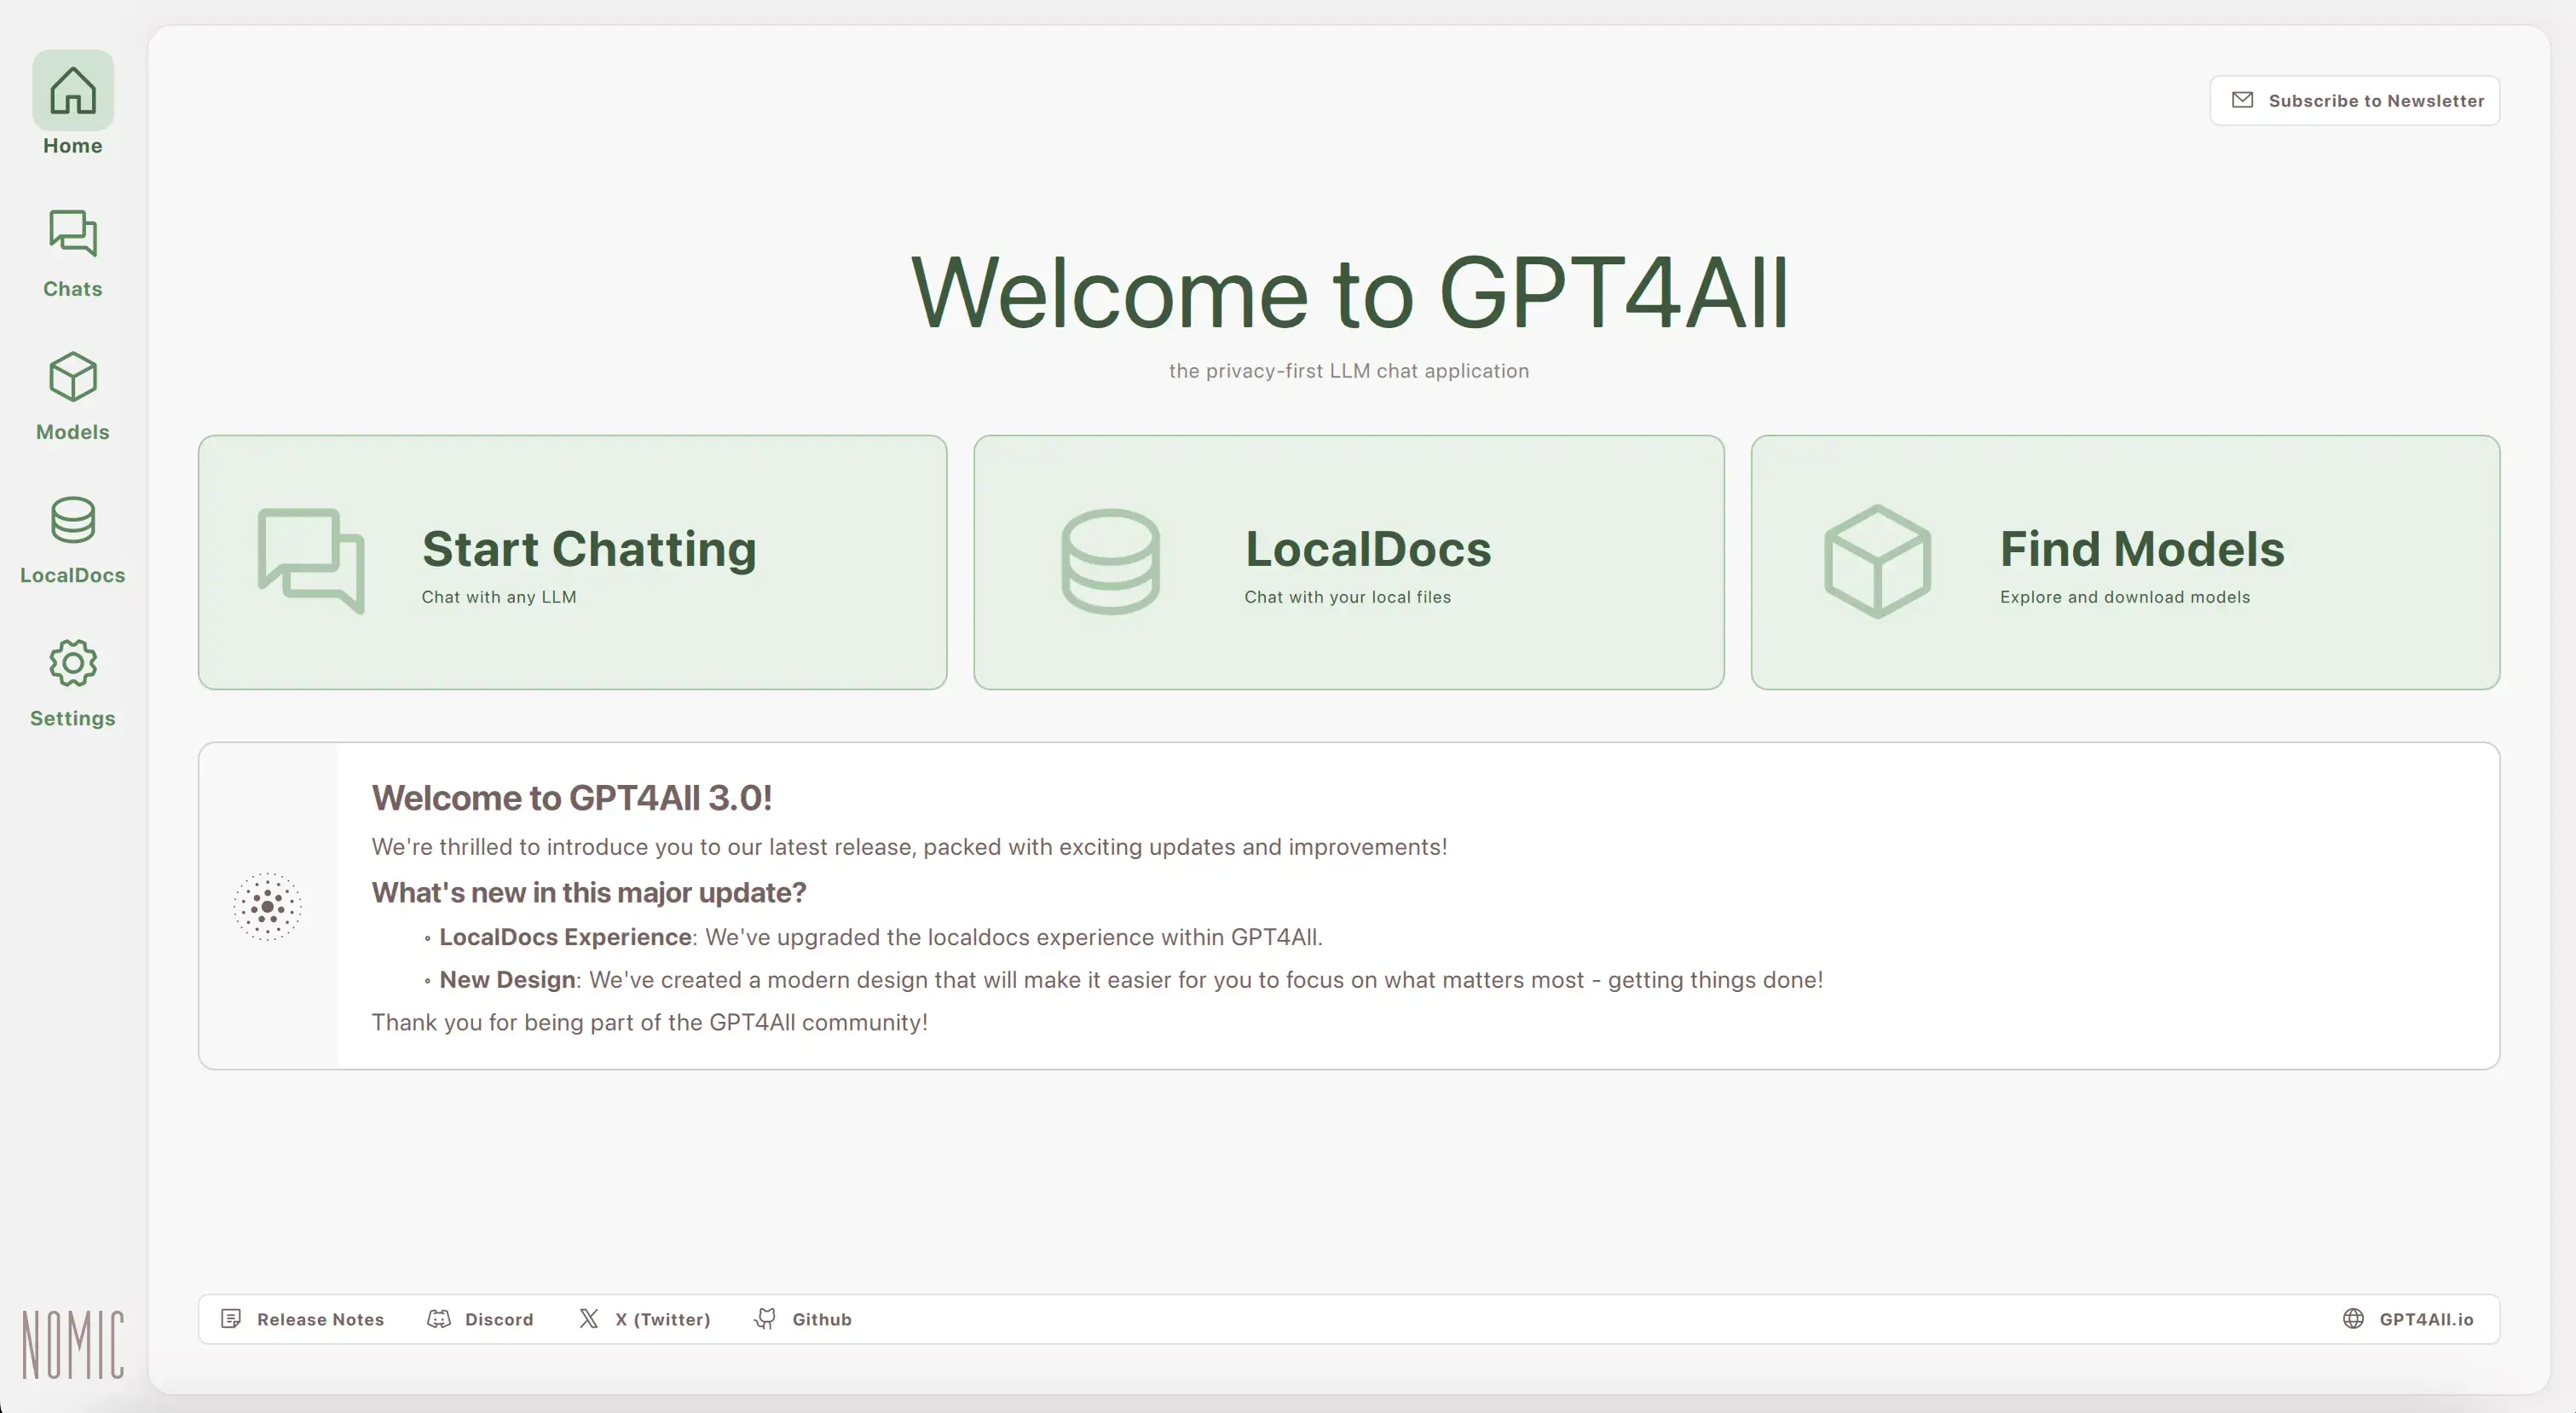
Why Choose It? GPT4All is the most accessible entry point for local AI on Ubuntu. You download it, open it like any desktop app, choose a model from the built-in library, and start chatting. There is no terminal, no virtual environment, and no configuration required. Nomic AI built it specifically for people who want the result – offline AI chat – without the setup work that comes with tools like Ollama.
- Install method: .deb package or Flatpak – no terminal required after download
- Model library: Built-in downloader for Llama, Mistral, Gemma, Phi, and more
- Local docs: Connect your own files for private document Q&A (RAG)
- DeepSeek-R1 support: Added in v3.7 – reasoning model now available in the GUI
- Fully offline: No internet connection required after models are downloaded
Quick Tip: GPT4All works on CPU-only machines. If you have a GPU, it will use it automatically. For document Q&A, use the LocalDocs tab and point it at a folder – it indexes your files locally without sending anything to a server.
Install Command:
# Then install with:
sudo dpkg -i gpt4all-installer-linux.deb# Or install via Flatpak:
flatpak install flathub io.gpt4all.gpt4all
Best For: Users who want a polished, ChatGPT-like desktop experience running fully offline
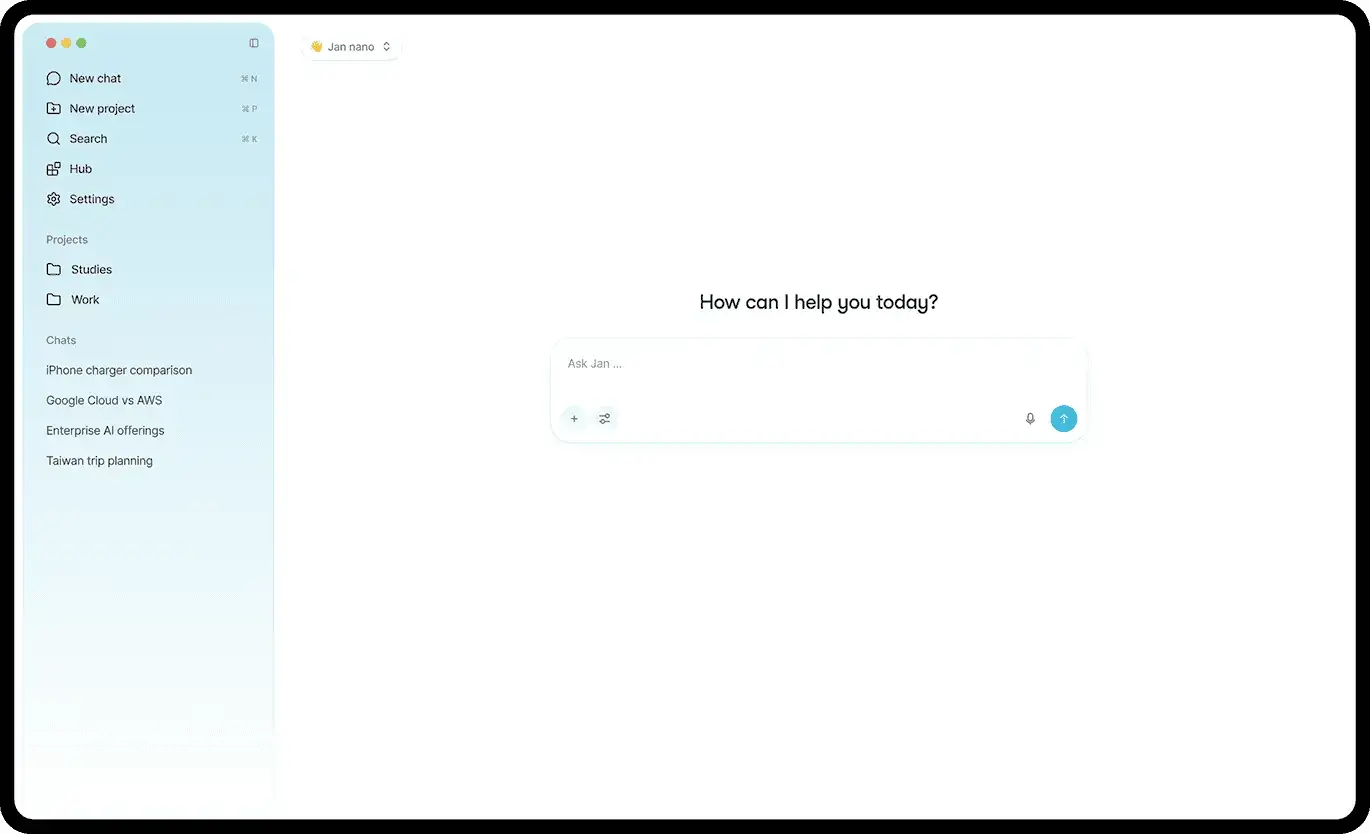
Why Choose It? Jan is an open source desktop application built with Tauri that aims to be a direct offline replacement for ChatGPT. The interface is clean, organized around conversations and model settings, and clearly designed by people who actually use AI chat daily. It supports extensions for speech-to-text, web search, document Q&A, and code highlighting – and unlike Ollama, it is a complete self-contained experience rather than a backend service that needs a separate frontend.
- Install method: AppImage or .deb – works on Ubuntu 24.04 and 26.04
- Model sources: Built-in downloader plus direct HuggingFace GGUF import
- Extensions: Speech-to-text, web search integration, RAG document querying
- API server: Expose an OpenAI-compatible local API from within the Jan UI
- Models: Llama, Gemma, Qwen, Mistral, DeepSeek, and any GGUF-format model
Quick Tip: Jan’s built-in model hub is convenient, but you can also drag and drop any GGUF file directly into the app to run models that are not in the official list. This gives you access to fine-tuned and community models from Hugging Face without any extra tools.
Install Command:
sudo dpkg -i jan-linux-amd64-[version].deb# Or download the AppImage, make it executable, and run:
chmod +x jan-linux-amd64-[version].AppImage
./jan-linux-amd64-[version].AppImage
Best For: Adding a full-featured browser-based chat UI to an existing Ollama setup
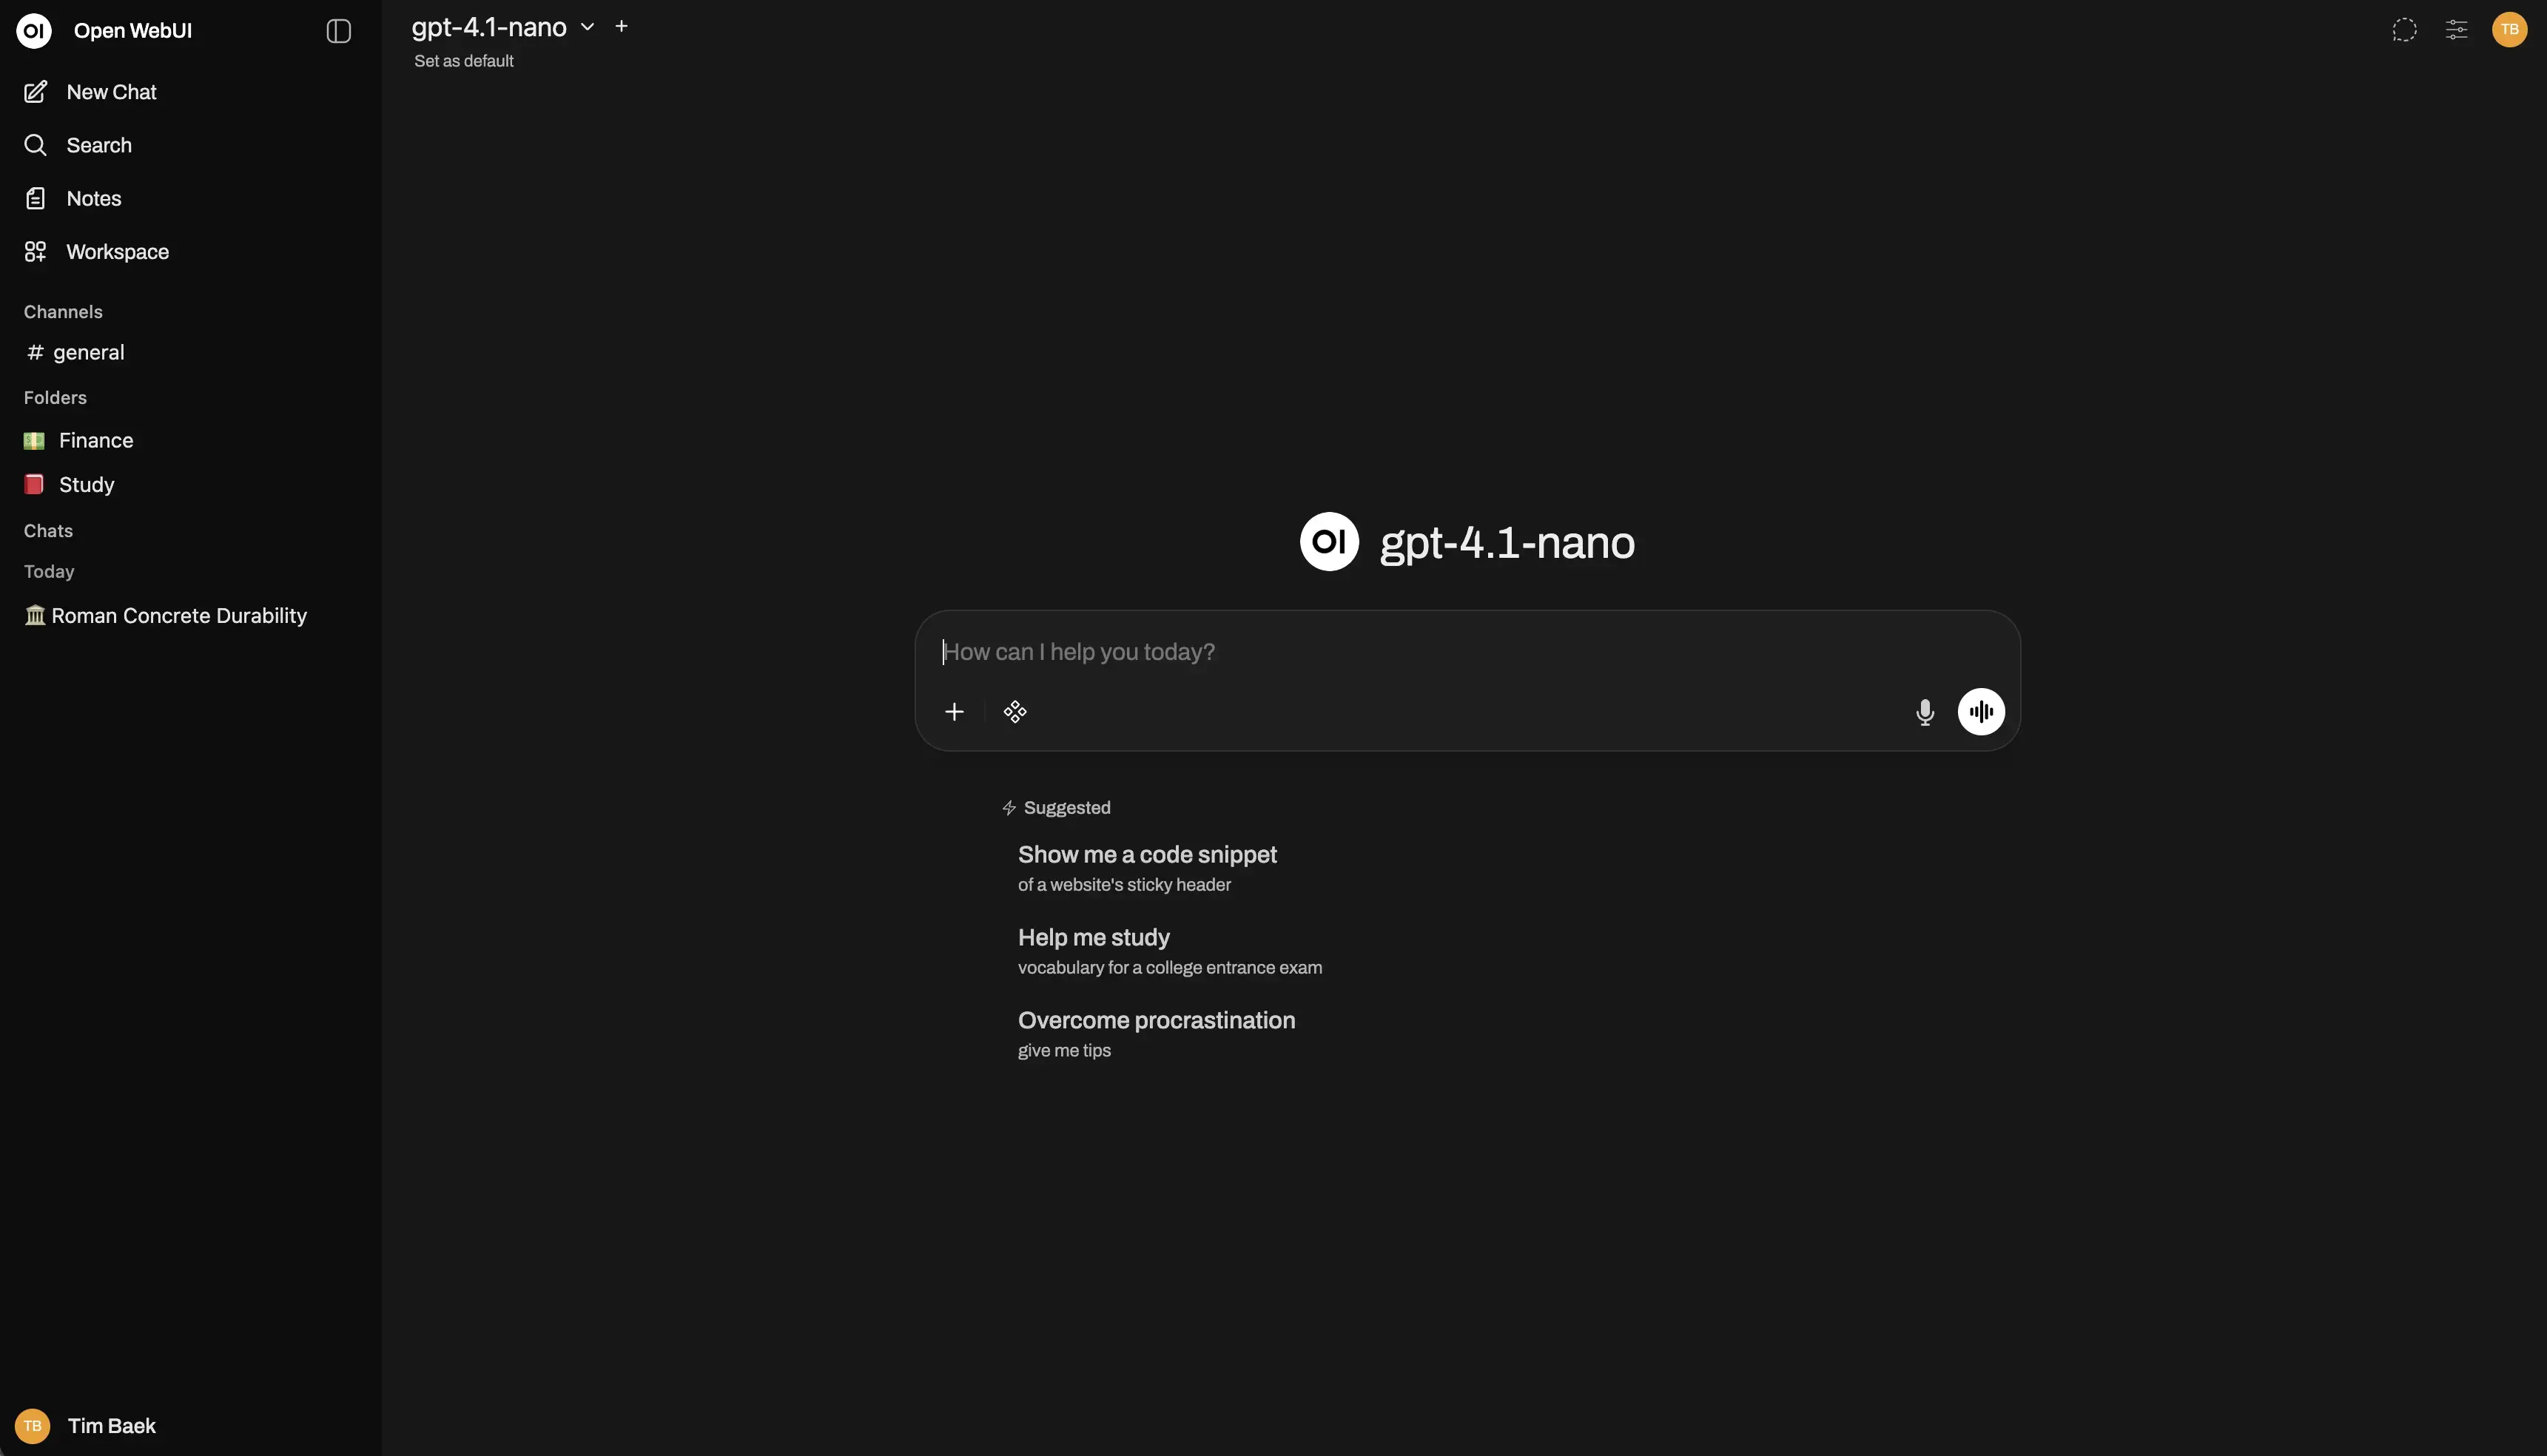
Why Choose It? Open WebUI is the most feature-complete web interface for self-hosted LLMs. It connects to Ollama (or any OpenAI-compatible API) and gives you a chat experience that rivals commercial products – with conversation history, user accounts, model switching, document upload, image generation, voice input, and web search, all running on your own server. If you have Ollama running and want a proper UI that you can access from any device on your network, Open WebUI is the answer.
- Connects to: Ollama, any OpenAI-compatible API, and multiple backends simultaneously
- Multi-user: User accounts with separate conversation history and permissions
- RAG support: Upload documents and query them directly in chat
- Install methods: Snap (simplest), Docker (recommended for production)
- Network access: Serve to your whole local network – any device, any browser
Quick Tip: The Snap install is the fastest path on Ubuntu – one command and it runs. For a more permanent setup with custom domains and HTTPS, use Docker with Nginx as a reverse proxy. The ComputingForGeeks guide for Ubuntu 26.04 covers this setup step by step.
Install Command:
sudo snap install open-webui# Docker install (recommended for production):
docker run -d -p 3000:8080 \
–add-host=host.docker.internal:host-gateway \
-v open-webui:/app/backend/data \
–name open-webui –restart always \
ghcr.io/open-webui/open-webui:main
🎨 AI Image Generation
These tools run Stable Diffusion and other open source image generation models directly on your Ubuntu machine. All three work without a cloud account. GPU is highly recommended – NVIDIA cards with 6 GB VRAM or more will give you the best experience, though lower VRAM is workable with the right settings.
Best For: Anyone starting fresh with AI image generation on Ubuntu in 2026
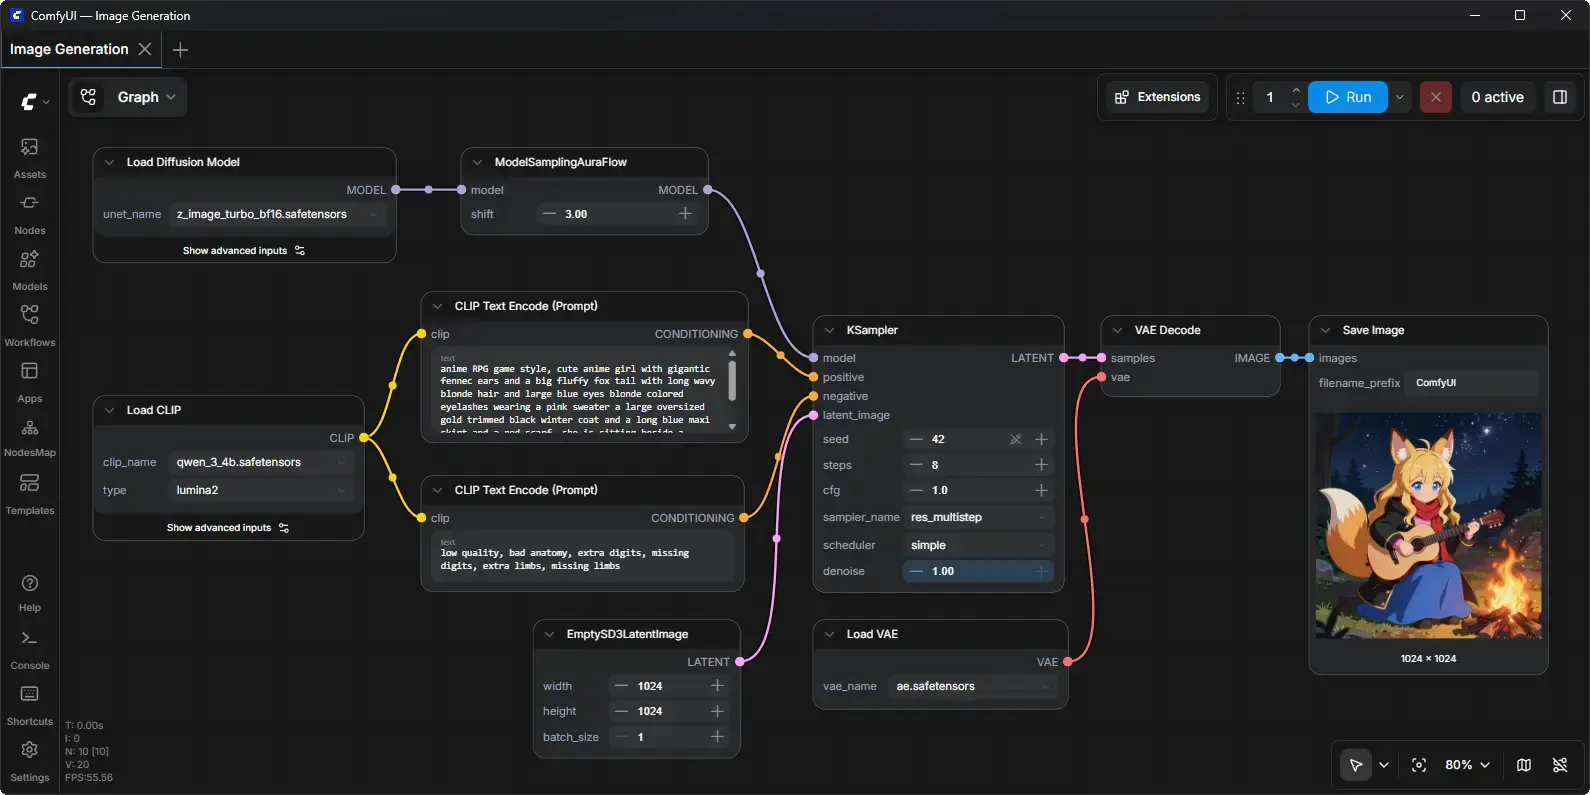
Why Choose It? ComfyUI has become the de facto standard for Stable Diffusion on Ubuntu. Its node-based workflow editor lets you build generation pipelines visually – connecting model loaders, samplers, LoRA injectors, upscalers, and more in a way that makes the process transparent and fully customizable. Benchmarks consistently show ComfyUI completing batches faster than AUTOMATIC1111 with lower VRAM usage, and it has first-class support for FLUX, SDXL, and SD 3.5 models. The community has built thousands of custom nodes that extend it in almost every direction.
- Interface: Node-based visual workflow editor – every step is visible and editable
- Model support: FLUX, SDXL, SD 1.5, SD 3.5, Stable Video Diffusion, and more
- Performance: Faster than AUTOMATIC1111 with better VRAM management
- GPU support: NVIDIA (CUDA), AMD (ROCm), Intel – auto-detected
- Extensions: Thousands of community custom nodes via ComfyUI Manager
Quick Tip: Install ComfyUI Manager immediately after setup – it lets you install, update, and manage custom nodes from inside the UI without touching the command line. It is the first thing most experienced users add.
Install Command:
cd ComfyUI
python3 -m venv venv
source venv/bin/activate
pip install -r requirements.txt
python main.py
Best For: Artists, photographers, and designers who want a structured, professional image generation workflow
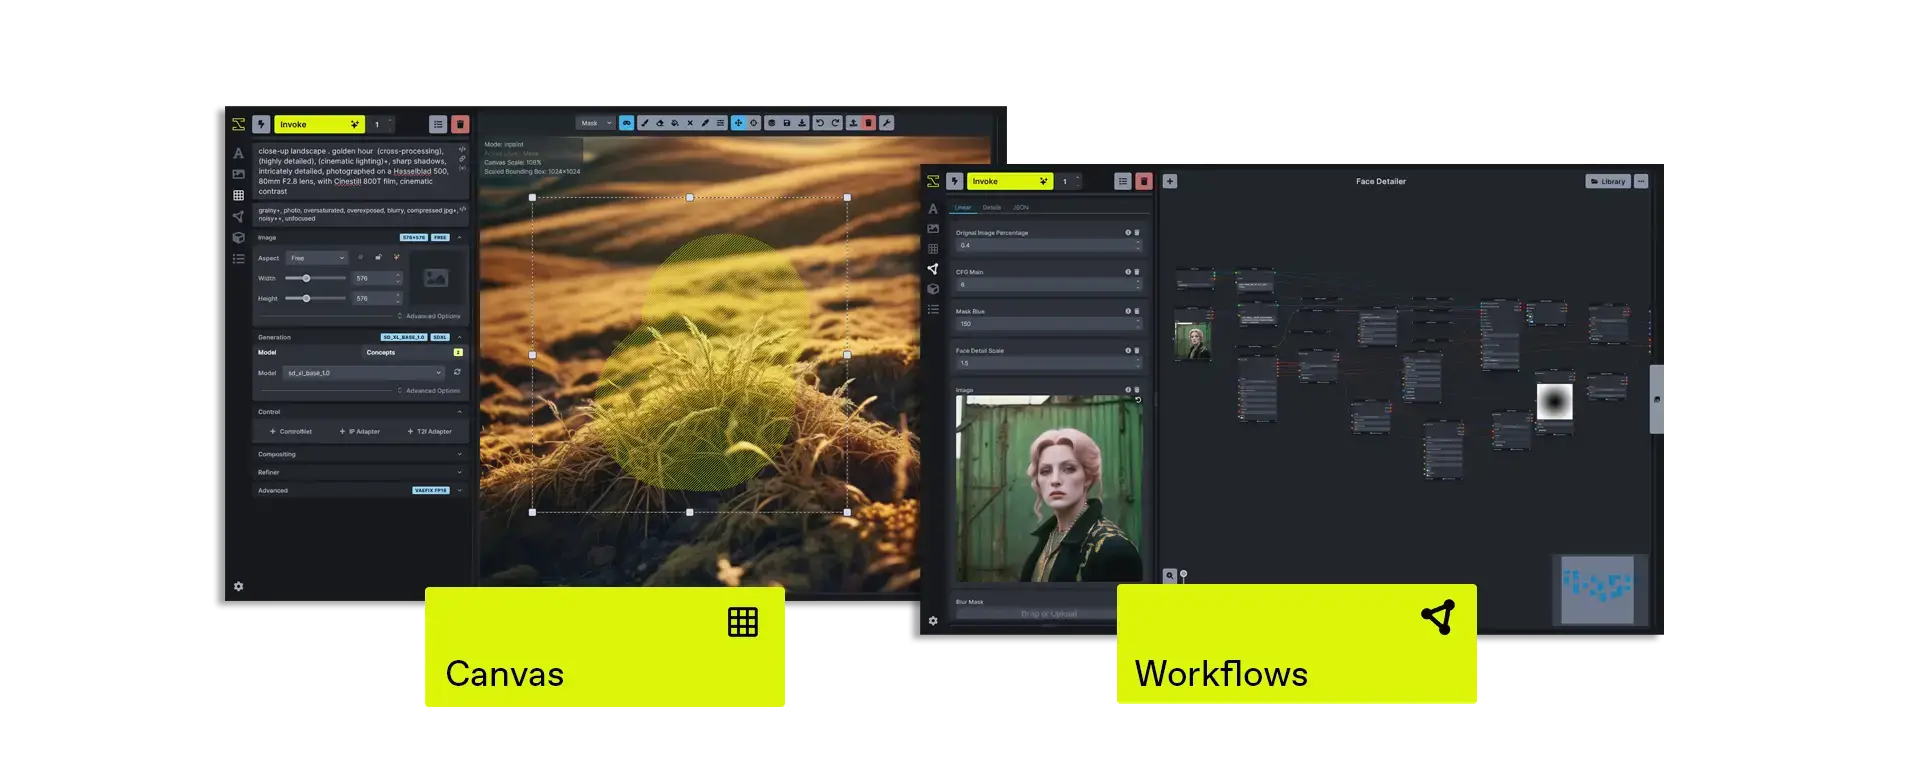
Why Choose It? InvokeAI takes a different approach to image generation than ComfyUI. Instead of nodes, it offers a canvas-based workflow where you can paint, mask, and composite images directly alongside your generation settings. Version 6.12 adds multi-user support with separate accounts on the same backend, enhanced FLUX.2 model support, and improved model management utilities. It runs well on modest hardware – as little as 4 GB of VRAM – and its web interface is genuinely approachable for users who find ComfyUI’s node editor overwhelming.
- Interface: Canvas-based web UI – paint, mask, and generate in the same workspace
- Model support: FLUX.2, SDXL, SD 1.5, ControlNet, LoRA, IP-Adapter
- Multi-user: Separate accounts on one backend (added in v6.12)
- Low VRAM: Runs on 4 GB VRAM with appropriate settings
- Professional use: Used as the foundation for several commercial image generation products
Quick Tip: InvokeAI’s installer script handles the Python virtual environment, dependencies, and initial model download for you. Run it once, follow the prompts, and InvokeAI opens in your browser automatically. No manual venv setup required.
Install Command:
invokeai-web
Best For: Users with existing AUTOMATIC1111 workflows, extensions, or who prefer the traditional tab-based interface
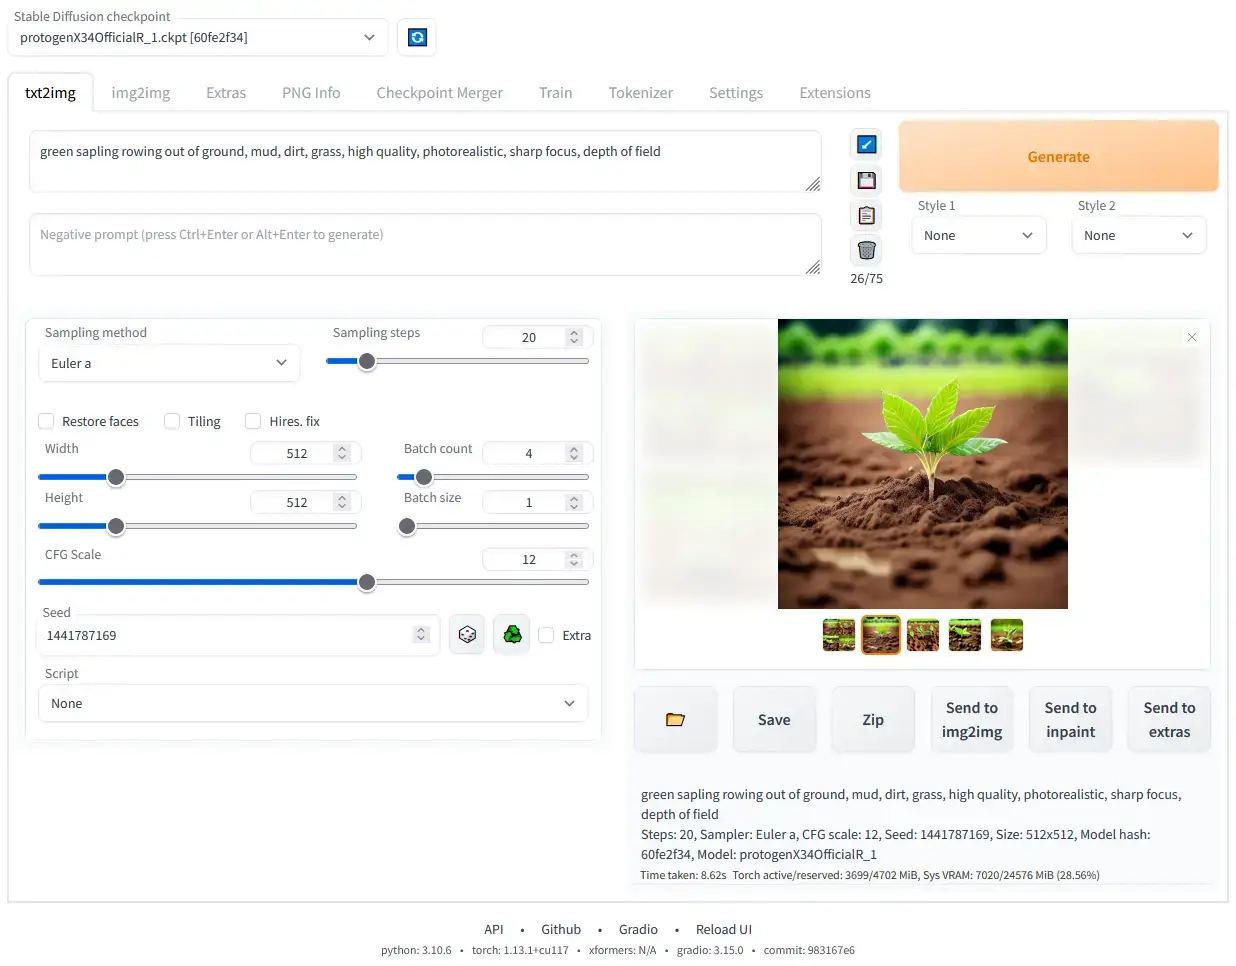
Why Choose It? AUTOMATIC1111 is the tool that popularized accessible Stable Diffusion on desktop hardware and it remains the most widely documented option in the community. It uses a familiar tab-based interface with dropdowns, sliders, and text fields – no node editing required. If you have followed any Stable Diffusion tutorial written in the last three years, it almost certainly used AUTOMATIC1111. The extension ecosystem is the largest in this space. That said, ComfyUI is now faster and more flexible for new setups. AUTOMATIC1111 is the right choice if you have an existing workflow built around it, or if you prefer its simpler interface.
- Interface: Traditional tab-based web UI – fill in fields and click generate
- Extensions: The largest extension library of any Stable Diffusion frontend
- Model support: SD 1.5, SDXL, ControlNet, LoRA, textual inversion, hypernetworks
- Community: 130k+ GitHub stars, enormous tutorial library, active CivitAI community
- License note: AGPL-3.0 – check terms carefully before commercial use
Quick Tip: If you are starting fresh and have no prior AUTOMATIC1111 experience, start with ComfyUI instead – it is faster and handles newer models better. If you are migrating an existing setup, AUTOMATIC1111 will continue to work reliably and most of your saved settings and extensions will carry over.
Install Command:
cd stable-diffusion-webui
./webui.sh
💻 AI Coding Assistants
These tools bring AI-powered code completion, editing, and pair programming to Ubuntu without requiring a paid subscription or cloud API. Each one takes a different approach – IDE plugin, terminal tool, or self-hosted server – so the right choice depends on how you work.
Best For: Ubuntu developers who want AI coding help inside VS Code or JetBrains IDEs, especially paired with local Ollama models

Why Choose It? Continue is an open source IDE plugin that works as a direct alternative to GitHub Copilot – except you choose which model powers it. You can connect it to a local Ollama instance for completely private, offline coding assistance, or point it at any cloud API for more capable models. It supports chat, inline code edits, autocomplete, and code documentation – all from inside your editor. With 2.4 million installs on the VS Code Marketplace, it is the most widely adopted open source coding assistant available in 2026.
- IDE support: VS Code (all forks), full JetBrains suite, Neovim (in development)
- Model flexibility: Connect to Ollama, any OpenAI-compatible API, or cloud providers
- Fully free: The plugin itself is free; you only pay for API costs if you use cloud models
- Offline mode: Pair with Ollama for 100% local, zero-cost AI coding on Ubuntu
- Context awareness: Indexes your codebase so the AI understands your project structure
Quick Tip: The fastest setup on Ubuntu is to install Ollama first, pull a coding-focused model like qwen2.5-coder:7b, then install the Continue extension from the VS Code Marketplace and point it at your local Ollama API. You get free, private AI autocomplete in about ten minutes.
Install Command:
code –install-extension Continue.continue# Or install the CLI tool:
npm install -g @continuedev/continue
Best For: Developers and teams who want a self-hosted GitHub Copilot replacement on their own Ubuntu server
Why Choose It? Tabby takes a fundamentally different approach from Continue and Aider. Rather than running locally inside your editor, Tabby is a server that you deploy on a machine with a GPU – your own Ubuntu box, a VPS, or a cloud instance – and then connect to from any editor on any device. This makes it the best option for teams who want shared AI coding infrastructure, or for individuals who want to run a single powerful model on their GPU server and connect from a lightweight laptop. It integrates with VS Code, JetBrains, and Vim via official plugins.
- Architecture: Server model – deploy once, connect from any device
- Model support: Qwen2.5-Coder, StarCoder2, DeepSeek-Coder, and more
- Editor plugins: VS Code, JetBrains, Vim – same server, any editor
- Context features: Indexes GitLab Merge Requests and repository history as coding context
- Self-contained: No external database or cloud service required
Quick Tip: Tabby recommends Ubuntu 22.04 with CUDA 12.4 for GPU deployments. For the best model performance on a single developer setup, Qwen2.5-Coder 7B is the current recommendation – it gives strong completions with reasonable VRAM requirements.
Install Command (Docker):
–gpus all \
-p 8080:8080 \
-v $HOME/.tabby:/data \
tabbyml/tabby:latest \
serve \
–model Qwen/Qwen2.5-Coder-7B-Instruct \
–device cuda
Best For: Terminal-first developers who want AI that edits files, commits to git, and works from the command line
Why Choose It? Aider is the most capable open source AI pair programmer available from the terminal. You run it inside your project directory, describe what you want done in plain English, and Aider reads the relevant files, edits them, and commits the changes to git with a sensible commit message. It maps your entire codebase so it understands the context of your request – not just the file you are looking at. With 44.5k GitHub stars and v1.14 released in April 2026, it is one of the most actively maintained tools in this entire list.
- Git integration: Reads, edits, and commits files automatically with meaningful commit messages
- Multi-file editing: Handles changes across multiple files in a single request
- Model flexibility: Works with any LLM – local Ollama, cloud APIs, or any OpenAI-compatible endpoint
- Language support: 100+ programming languages
- Repo mapping: Builds a context map of your codebase to understand structure and dependencies
Quick Tip: Start Aider inside your git repository with aider --model ollama/qwen2.5-coder:7b to use a local model. Aider will ask you which files to work with, or you can specify them at startup. Always review the diff before confirming – Aider shows exactly what it changed before committing.
Install Command:
pip install aider-chat –break-system-packages
# Run in your project directory:
cd your-project
aider –model ollama/qwen2.5-coder:7b
🧑 ML Frameworks for Developers
These are the foundational libraries that the entire AI research and development ecosystem is built on. You do not use these to chat with an AI – you use them to build, fine-tune, and deploy AI models. If you are writing Python code to work with machine learning, you will almost certainly need at least one of these.
Before you install: Always use a Python virtual environment for ML framework installations. These libraries have complex dependencies that can conflict with each other and with system packages. Create one with python3 -m venv ~/.venvs/ml and activate it with source ~/.venvs/ml/bin/activate before running any pip install commands below. This keeps your system Python clean and avoids the most common installation errors.
Best For: Researchers, developers, and anyone building or fine-tuning AI models from scratch
Why Choose It? PyTorch is the dominant ML framework in 2026. Nearly every major open source model – Llama, Gemma, Mistral, Stable Diffusion, Whisper, and more – ships with PyTorch weights first. It is the framework most university AI courses teach, and the one that research papers implement. If you are learning ML, working with open source models, or fine-tuning any modern architecture, PyTorch is where you start. Its dynamic computation graph makes debugging intuitive, and the ecosystem built around it – including Hugging Face Transformers – handles most of the heavy lifting for common tasks.
- Ecosystem: The default framework for virtually all open source AI research and model releases
- GPU support: NVIDIA CUDA, AMD ROCm, and Apple Silicon – install command generated at pytorch.org
- Python requirement: Python 3.10 or later (Ubuntu 24.04 and 26.04 both qualify)
- Tools built on it: Hugging Face Transformers, TorchVision, TorchAudio, Lightning, and more
- Production use: Used in production by Meta, OpenAI, and most major AI companies
Quick Tip: Always generate your install command from pytorch.org/get-started/locally/ rather than using a generic pip command. The correct flags depend on your CUDA version, Python version, and whether you want CPU or GPU support – the site generates the exact command for your configuration.
Install Command:
pip install torch torchvision torchaudio –index-url https://download.pytorch.org/whl/cpu# NVIDIA GPU (CUDA 12.1 – verify your CUDA version first):
pip install torch torchvision torchaudio –index-url https://download.pytorch.org/whl/cu121
Best For: Developers who want to use, fine-tune, or evaluate pre-trained AI models without building from scratch
Why Choose It? Hugging Face Transformers is the library that sits between you and the raw model weights. It gives you a consistent Python API to load, run, and fine-tune 500,000+ models from the Hugging Face Hub – whether you are doing text generation, image classification, speech recognition, or anything else. Version 5.0 is a major rewrite that simplifies model definitions and improves consistency across architectures. If PyTorch is the engine, Transformers is the gearbox – almost no one works with PyTorch for NLP or vision tasks without it.
- Model access: 500,000+ models on the Hugging Face Hub – load any with two lines of code
- Task coverage: Text, vision, audio, multimodal – consistent API across all
- Fine-tuning: Built-in Trainer class for supervised fine-tuning and RLHF workflows
- Quantization: Built-in support for 4-bit and 8-bit quantization via bitsandbytes
- v5.0: Simplified model definitions, improved architecture consistency, cleaner API
Quick Tip: The pipeline() function is the fastest way to run any model for inference. One line loads the model and tokenizer together: pipe = pipeline("text-generation", model="meta-llama/Llama-3.2-1B"). This is the right starting point before you need lower-level control.
Install Command:
pip install “transformers[torch]”
# With sentencepiece for tokenizer support:
pip install “transformers[torch,sentencepiece]”
Best For: Teams using Google Cloud, TensorFlow Serving, or TFLite for production deployment; anyone with existing TensorFlow codebases
Why Choose It? TensorFlow is still actively maintained and receives regular updates. Version 2.21 was released in March 2026 and supports Python 3.10 through 3.13, covering both Ubuntu 24.04 and 26.04 out of the box. While PyTorch has become the research default, TensorFlow retains strong relevance in production environments – particularly for teams using TensorFlow Serving, TFLite for mobile and edge deployment, or Google Cloud’s AI infrastructure. If your team’s existing code is in TensorFlow, or your deployment pipeline targets Google’s stack, it remains the sensible choice.
- Current version: 2.21.0 (March 2026) – actively maintained, not abandoned
- Production tooling: TensorFlow Serving, TFLite, TFX pipeline tools
- Python support: 3.10, 3.11, 3.12, and 3.13 – fully compatible with Ubuntu 24.04 and 26.04
- Keras integration: Keras 3 now works as a unified frontend across TensorFlow, PyTorch, and JAX
- Google ecosystem: Native integration with TPUs, Vertex AI, and Google Cloud services
Quick Tip: If you are starting a new project without any prior TensorFlow investment, PyTorch is the better default in 2026 – the model ecosystem, tutorials, and community momentum are stronger there. TensorFlow makes most sense when you already have it in your stack or your deployment target is Google infrastructure.
Install Command:
pip install tensorflow
# Verify the install:
python3 -c “import tensorflow as tf; print(tf.__version__)”
Best For: ML researchers writing custom training loops, physics simulations, or novel optimizers – especially on TPUs
Why Choose It? JAX is Google DeepMind’s ML framework, built around a functional programming model and a JIT compiler that can target CPUs, GPUs, and TPUs from the same code. It is not a general-purpose choice – JAX is for people who need to write fast, custom numerical code: researchers exploring new model architectures, developers working on physics engines or molecular simulations, or teams that need TPU performance at scale. If that description fits your work, JAX is genuinely excellent. If it does not, start with PyTorch instead. JAX is gaining serious traction in research labs, but the tutorial and pre-trained model ecosystem is still smaller than PyTorch’s.
- Core strength: Functional programming, automatic differentiation, JIT compilation via XLA
- Hardware targets: CPU, GPU, and TPU from the same codebase
- Neural net layers: Use Flax, Haiku, or Equinox on top – JAX itself is low-level
- Use cases: Novel architectures, physics simulations, custom optimizers, large-scale research
- Not for: Loading pre-trained models from Hugging Face Hub – most checkpoints are PyTorch-first
Quick Tip: JAX alone is just a numerical computing library. To build neural networks you need a framework on top – Flax is the most commonly used option from the Google DeepMind team. Install both together: pip install jax flax.
Install Command:
pip install jax# NVIDIA GPU (CUDA 12):
pip install “jax[cuda12]”
# With Flax for neural network layers:
pip install jax flax
📄 All 14 Tools at a Glance
| Tool | Category | License | Install Method | GPU Needed? | Best For |
|---|---|---|---|---|---|
| Ollama | Local LLM | MIT | Shell script | Optional | Running LLMs with one command |
| GPT4All | Local LLM | MIT | .deb / Flatpak | Optional | Beginners, no terminal |
| Jan | Local LLM | MIT | .deb / AppImage | Optional | Polished offline ChatGPT alternative |
| Open WebUI | Local LLM UI | MIT | Snap / Docker | No (runs with Ollama) | Browser UI for Ollama |
| ComfyUI | Image Generation | GPL-3.0 | git clone + pip | Yes (4 GB+ VRAM) | Fast, flexible image generation |
| InvokeAI | Image Generation | Apache 2.0 | pip | Yes (4 GB+ VRAM) | Artists, canvas workflow |
| AUTOMATIC1111 | Image Generation | AGPL-3.0 | git clone + script | Yes (4 GB+ VRAM) | Existing A1111 users, large extension library |
| Continue.dev | Coding Assistant | Apache 2.0 | VS Code extension | No | IDE-based AI coding, VS Code + JetBrains |
| Tabby | Coding Assistant | Apache 2.0 | Docker | Recommended | Self-hosted team coding server |
| Aider | Coding Assistant | Apache 2.0 | pip | No | Terminal AI pair programming, git-native |
| PyTorch | ML Framework | BSD | pip | For training | All AI research and model work |
| HF Transformers | ML Framework | Apache 2.0 | pip | For training | Loading and fine-tuning pre-trained models |
| TensorFlow | ML Framework | Apache 2.0 | pip | For training | Google Cloud, production pipelines, TFLite |
| JAX | ML Framework | Apache 2.0 | pip | Optional (TPU for scale) | Researchers, custom training, TPU workloads |
🎯 Which Tool Is Right for You?
Start with GPT4All – install the .deb, open it, pick a model, and start chatting. No terminal required. If you want more control over which model runs in the background, install Ollama first and add Open WebUI for the browser chat experience.
Ollama is your foundation. It runs as a service, exposes a local API, and connects to Continue.dev, Aider, Open WebUI, and almost any tool that accepts an OpenAI-compatible endpoint. Install Ollama first, then build from there.
Start with ComfyUI – it is faster, handles newer models better, and has the most active development. If you find the node editor overwhelming, try InvokeAI instead for its cleaner canvas interface. Only use AUTOMATIC1111 if you have existing workflows built around it.
Install Ollama and pull a coding model like qwen2.5-coder:7b, then install the Continue.dev VS Code extension and point it at your local Ollama API. Free, private, offline AI autocomplete in about ten minutes.
Aider is built exactly for this. Run it inside your git repository, tell it what to change in plain English, and it edits the relevant files and commits the result. It works with local Ollama models or any cloud API.
Tabby is designed for this. Deploy it on a machine with a GPU, and everyone on the team connects via their VS Code or JetBrains plugin. One server, any editor, any device on the network.
Install PyTorch and Hugging Face Transformers together. Transformers gives you access to hundreds of thousands of pre-trained models with a simple API, and PyTorch is what everything runs on underneath. Start with the Transformers pipeline() function for your first experiments.
JAX with Flax on top is the combination most favored by Google DeepMind and research labs that need to write highly customized training code or work at scale on TPUs. Start with the official JAX documentation and the Flax quickstart guide.
❓ Frequently Asked Questions
What is the best open source AI tool for running LLMs locally on Ubuntu?
Ollama is the most popular choice in 2026. It installs with a single command, runs on Ubuntu 24.04 and 26.04, and supports dozens of models including Llama, Mistral, Gemma, and Qwen. Open WebUI adds a full browser-based chat interface on top for users who want something more than the terminal.
Can I run AI image generation on Ubuntu without a subscription?
Yes. ComfyUI and InvokeAI both run entirely on your own hardware with no cloud account needed. ComfyUI uses a node-based workflow and is faster and more memory-efficient. InvokeAI offers a cleaner canvas interface suited to artists and photographers. Both support FLUX, SDXL, and other modern models.
Is AUTOMATIC1111 still worth using in 2026?
It still works and is actively maintained with over 130,000 GitHub stars. But ComfyUI is now faster, more memory-efficient, and better supported for newer models like FLUX. AUTOMATIC1111 makes most sense if you have an existing workflow built around it or need access to its large legacy extension library. For new setups, ComfyUI is the better starting point.
What is the best open source AI coding assistant for Ubuntu?
It depends on how you work. Continue.dev integrates directly into VS Code and JetBrains IDEs and works with local Ollama models for fully offline coding assistance. Aider is the strongest choice for terminal users – it edits files, commits to git, and works from the command line with any LLM. Tabby is the best option if you want a self-hosted server that your whole team can connect to.
Do I need a GPU to run AI tools on Ubuntu?
Not for everything. Ollama, GPT4All, and Jan all run on CPU-only machines, though responses will be noticeably slower with large models. Image generation tools like ComfyUI and InvokeAI technically run on CPU but are impractically slow without a GPU – at minimum 4 GB of VRAM, with 8 GB or more giving a much better experience. PyTorch and Hugging Face Transformers work on CPU for inference, but training any meaningful model without a GPU is not practical.
Is PyTorch or TensorFlow better for Ubuntu in 2026?
PyTorch is the dominant choice for research and most new projects. Nearly every major open source model ships with PyTorch weights first, and the community resources, tutorials, and tooling around it are stronger. TensorFlow is still actively maintained – version 2.21 released in March 2026 – and remains relevant for production deployment pipelines, TFLite edge deployments, and teams already using the Google Cloud ecosystem.
What is JAX and who should use it on Ubuntu?
JAX is Google DeepMind’s ML framework built around functional programming and hardware acceleration. It is not a beginner tool. JAX is most useful for researchers writing custom training loops, physics simulations, or novel optimizers, especially on TPUs. For general model use and fine-tuning, PyTorch and Hugging Face Transformers are more practical.
Are these tools free to use commercially?
Most are fully open source and free for commercial use. Ollama, GPT4All, Jan, Open WebUI, InvokeAI, Continue.dev, Aider, Tabby, PyTorch, Hugging Face Transformers, TensorFlow, and JAX are all released under permissive open source licenses (MIT, BSD, or Apache 2.0). ComfyUI uses GPL-3.0, and AUTOMATIC1111 uses AGPL-3.0 – both are open source but have copyleft requirements that may affect commercial use. Check the license terms for your specific situation.
More Ubuntu software guides: Best Web Browsers for Ubuntu · Best Software for Ubuntu · Best VM Software on Linux