To install Android Studio on Ubuntu, you can use the official Snap package for automated updates, or manually extract the official Linux Tarball archive for a container-free installation with in-app updater support.
Running a fully-featured development environment also requires configuring hardware virtualization for the emulator and setting up device rules for USB debugging.
Choosing the correct installation method depends on whether you prefer system sandbox isolation or direct filesystem access. Let us know in the comments below if you run into any setup issues, or you can contact us directly for developer support.
Set up the official IDE for Android development on Ubuntu 24.04 and 26.04 LTS. This comprehensive guide covers desktop integration, emulator virtualization, and hardware testing. Estimated reading time: 20~ minutes.
Comparing Android Studio Installation Methods
Before beginning the installation, review the trade-offs of each method to determine which fits your development workflow best.
| Metric | Snap (Official) | Tarball (Official) | Flatpak (Community) | PPA (Third-Party) |
|---|---|---|---|---|
| Updates | Automatic (background) | Manual (in-app check) | Automatic (background) | System package manager |
| Isolation | Classic Confinement | None (Direct execution) | Strict Sandbox | None (Direct execution) |
| SDK Location | ~/Android/Sdk | ~/Android/Sdk | ~/.var/app/com.google… | ~/Android/Sdk |
| Maintainer | Community-vetted | Independent user |
Step 1: Install System Prerequisites
For Android Studio and the Android Emulator to operate correctly, virtualization must be enabled in hardware, and critical 32-bit compilation libraries must be added.
Open a terminal session and query your CPU core flags to verify virtualization compatibility:
egrep -c '(vmx|svm)' /proc/cpuinfo
Any result of 1 or higher indicates hardware-level virtualization is supported. If the output returns 0, you must enter your computer’s BIOS/UEFI settings on boot and activate VT-x, AMD-V, or SVM Mode.
Register 32-bit application configurations with the package manager, update index lists, and install virtualization check tools along with standard compatibility libraries:
sudo dpkg --add-architecture i386
sudo apt update
sudo apt install -y libc6:i386 libncurses5:i386 libstdc++6:i386 lib32z1 libbz2-1.0:i386 cpu-checker
Validate KVM hardware acceleration is available for immediate setup:
kvm-ok
Method 1: Install Android Studio via Snap (Recommended)
The Snap package is built and maintained directly by Google, providing the easiest way to install and run Android Studio on Ubuntu. Since it is sandboxed and automatically updated in the background, you get the latest stable releases without manually downloading or extracting archives.
Because the IDE requires access to hardware virtualization layers (KVM) and connected USB controllers for device debugging, it must bypass standard snap sandbox limits using classic confinement:
sudo snap install android-studio --classic
Once the installation finishes, you can launch Android Studio directly from your desktop applications menu. The snapd service daemon will manage updates in the background.
Method 2: Install Android Studio via Official Tarball
For developers who prefer to avoid containerized package runtimes, the official manual archive is the standard alternative. This method runs natively on the host filesystem and supports the integrated, in-app SDK and IDE update prompts.
Retrieve the stable package version (Quail 1) using the console terminal:
wget https://dl.google.com/dl/android/studio/ide-zips/2026.1.1.8/android-studio-quail1-linux.tar.gz
Extract the archive contents and relocate the directory to the system applications folder:
tar -xvf android-studio-quail1-linux.tar.gz
sudo mv android-studio /opt/
Launch the initialization script from the install path to configure components:
cd /opt/android-studio/bin
./studio.sh
Follow the wizard steps to confirm installation directory choices and cache setups.
Navigate to Tools > Create Desktop Entry within the IDE, or manually create a desktop configuration file:
nano ~/.local/share/applications/android-studio.desktop
Paste the configuration block below into the editor and save:
[Desktop Entry]
Version=1.0
Type=Application
Name=Android Studio
Icon=/opt/android-studio/bin/studio.png
Exec="/opt/android-studio/bin/studio.sh" %f
Comment=Android Studio IDE
Categories=Development;IDE;
Terminal=false
StartupWMClass=jetbrains-studio
Method 3: Alternative Installation Paths (Flatpak & PPA)
While Snap and Tarball are the primary official methods, community alternatives exist. Review the security and isolation constraints of each before deploying them on your development machine.
The Flatpak package is community-maintained. Because the application runs inside an isolated container sandbox, it can require additional configuration to recognize connected USB physical debugging devices and to access host virtualization layers (KVM). Install the app using flatpak:
flatpak install flathub com.google.AndroidStudio
To allow Flatpak direct filesystem access to your system’s SDK configs and USB controller paths, you can manage permissions via a tool like Flatseal or use the command-line override tools.
A community-maintained Personal Package Archive (PPA) can automate downloads via the native APT manager, but it is not officially supported or built by Google. Add the PPA repository and install the package:
sudo add-apt-repository ppa:maarten-fonville/android-studio
sudo apt update
sudo apt install android-studio
Use third-party repositories with caution as they rely entirely on the personal publisher to build and publish security releases.
Android Studio Ubuntu Installation Video Guide
Android Studio Screenshots
-
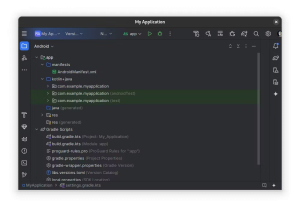
- Select multiple folders from Android Studio on Ubuntu
-
- Screenshot of myapplication on ubuntu snap from Android Studio on Ubuntu
-
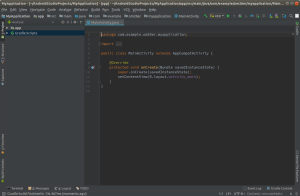
- Light theme application from Android Studio on Ubuntu
-
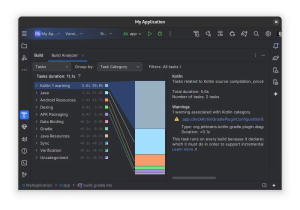
- Kotlin 1 warning in android studio from Android Studio on Ubuntu
-
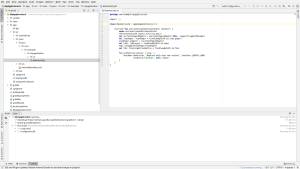
- Importing from Android Studio on Ubuntu
-
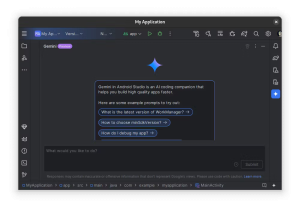
- Gemini in android studio from Android Studio on Ubuntu
-
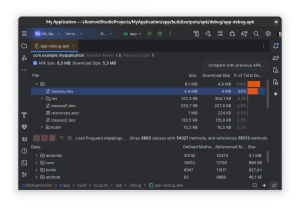
- Debug android studio from Android Studio on Ubuntu
-
- Coding an android app in android studio ide from Android Studio on Ubuntu
Android Studio Local Environment Layout
To help understand how the IDE, virtualization tools, and physical devices interact, reference the environment structure below:

Step 2: Post-Install Virtualization & SDK Configuration
For the IDE to compile projects and run emulator images at full hardware speeds, you must configure virtualization groups and assign your host environment variables.
Install system hypervisors and virtual tools, enable the service daemon, and assign group configurations to run without root requirements:
sudo apt update
sudo apt install -y qemu-kvm libvirt-daemon-system libvirt-clients bridge-utils virtinst
sudo systemctl enable --now libvirtd
Add your user account to the system virtualization groups:
sudo usermod -aG libvirt $USER
sudo usermod -aG kvm $USER
Force session group updates immediately without logging out:
newgrp libvirt
newgrp kvm
Open the user configuration profile script:
nano ~/.bashrc
Append the path settings at the bottom of the profile:
# Android SDK Configuration
export ANDROID_HOME=$HOME/Android/Sdk
export PATH=$PATH:$ANDROID_HOME/emulator
export PATH=$PATH:$ANDROID_HOME/platform-tools
export PATH=$PATH:$ANDROID_HOME/cmdline-tools/latest/bin
Source the configuration to apply the profile values to the current terminal environment:
source ~/.bashrc
By default, Gradle is allocated a conservative heap limit that can lead to build thrashing and slow compiles on medium-to-large projects. You can globally raise the JVM heap size and enable the G1 garbage collector by creating or editing your user-level Gradle configuration:
mkdir -p ~/.gradle && nano ~/.gradle/gradle.propertiesPaste the following performance parameters (adjust -Xmx4g to -Xmx8g if your machine has 32 GB or more of system RAM):
org.gradle.jvmargs=-Xmx4g -XX:MaxMetaspaceSize=512m -XX:+UseG1GC -XX:+ParallelRefProcEnabledStep 3: Configure USB Debugging (udev Rules)
If you connect a physical Android device via USB, Ubuntu will block the debugger access by default due to file permission safety checks. You must create custom udev rules to permit the host to recognize your connected phone.
Ensure USB Debugging is active on your device. Connect the phone via USB cable and list hardware controllers:
lsusb
Locate your manufacturer line. Output will look similar to this: ID 18d1:d002 Google Inc.. The first block (18d1) represents your Vendor ID, and the second (d002) is your Product ID.
Open the rules configurations file:
sudo nano /etc/udev/rules.d/51-android.rules
Paste the rules configuration below, replacing Vendor and Product IDs with your exact hardware values:
SUBSYSTEM=="usb", ATTR{idVendor}=="18d1", ATTR{idProduct}=="d002", MODE="0660", GROUP="plugdev", SYMLINK+="android%n"
Ensure your account belongs to the plugdev system group:
sudo usermod -aG plugdev $USER
Apply rules by reloading system services and restarting the ADB server daemon:
sudo udevadm control --reload-rules
newgrp plugdev
adb kill-server
adb devices
Your phone screen will print a prompt requesting connections authentication. Check “Always allow” to authenticate.
Uninstalling Android Studio & SDKs
If you need to cleanly revert your system settings and remove the developer tools, follow the commands matching your original installation choice.
Execute the removal command matching your package installation path:
For Snap installations:
sudo snap remove android-studio
For manual Tarball installations:
sudo rm -rf /opt/android-studio
rm ~/.local/share/applications/android-studio.desktop
For Flatpak installations:
flatpak uninstall com.google.AndroidStudio
For PPA installations:
sudo apt remove android-studio && sudo add-apt-repository --remove ppa:maarten-fonville/android-studio
Purge hidden directories to release cache allocations and recover gigabytes of system storage space:
rm -rf ~/Android/Sdk
rm -rf ~/.config/Google/AndroidStudio*
rm -rf ~/.local/share/Google/AndroidStudio*
rm -rf ~/.cache/Google/AndroidStudio*
Frequently Asked Questions
Does Android Studio bundle its own Java Runtime (JDK)?
Yes. Android Studio comes bundled with a performance-optimized JetBrains Runtime (JBR) based on OpenJDK. You do not need to install an external Java compiler on your system to run the IDE. However, you can configure Gradle to use a separate system OpenJDK (like JDK 17) if required for specific projects.
How do I fix the “Android SDK is missing” warning during the first startup?
This warning is normal on a fresh installation. When you launch the IDE for the first time, the Setup Wizard will detect that no SDK files exist. Select the default options in the wizard, and Android Studio will automatically download and configure the SDK components in your local folder.
Why does my Android Emulator run so slowly on Ubuntu?
Slow emulator performance is usually caused by missing hardware virtualization. Ensure that KVM is installed and that your user account has been added to both the kvm and libvirt system groups. Running the emulator without hardware acceleration forces the system to rely on software emulation, causing significant lag.
Where does Android Studio save my project configurations and caches?
Android Studio saves its local settings and cache files in `~/.config/Google/AndroidStudio[Version]` and user database configurations in `~/.local/share/Google/AndroidStudio[Version]`. Project source codes are stored in whichever directories you choose when creating a new workspace, typically inside a folder named `~/AndroidStudioProjects`.
Is the Maarten Fonville PPA repository safe to use for Android Studio installs?
The PPA is widely used and maintained by a community member, but it is not an official release channel from Google. For high-security environments, it is recommended to use the official Snap package or the direct Tarball archive from the official developer portal to guarantee source integrity.
- Android Studio Official Site – Official documentation, release notes, and SDK platform guides.
- Android Emulator Acceleration Docs – Troubleshooting guides for hardware acceleration and KVM diagnostics.
- UbuntuFree Support & Contact Page – Contact our developer support team directly for help.
More Ubuntu developer guides: Sublime Text on Ubuntu · Docker Ubuntu Install · Docker Compose on Ubuntu · Ubuntu Keyboard Shortcuts