
 You can install the Tilix terminal window app on Ubuntu using APT, a community-maintained PPA, or directly from GitHub.
Tilix is a modern terminal built to match the Ubuntu desktop. Its best feature is tiling, you can split one window into multiple terminals side-by-side or top-to-bottom, drag them around with your mouse, and even type in all of them at once.
The original creator no longer updates it, but the community actively maintains it so it works perfectly on modern Ubuntu releases.
This guide shows you how to install and set up Tilix on Ubuntu 26.04, 24.04, and 22.04 LTS, how to launch it, customize its colors, set it as your default terminal, and remove it completely if you don’t need it anymore.
If you have any questions, write a comment below or contact us. We are happy to help.
tilix (available in Ubuntu’s default software sources)ppa:ubuntuhandbook1/tilix (optional)Simple APT, PPA, and GitHub Setup Guides
Learn how to install the Tilix split-screen terminal. We will show you how to split your window, set shortcuts, configure a drop-down screen, and fix common warnings.
Before you install, compare the three methods to decide which one is best for your computer setup.
Tilix Installation Methods Compared
Use the comparison table below to check where the files come from, what version you get, and how you receive future updates.
| Method | Source Channel | Typical Version Scope | Schema Setup | Desktop Integration |
|---|---|---|---|---|
| APT Universe | Official Ubuntu Repositories | Stable version verified for your specific Ubuntu release. | Automatic (handled by installer) | Matches your theme, adds menu icons, and configures shortcuts automatically. |
| Launchpad PPA | Community PPA Repository | Newer stable version (helpful for older Ubuntu releases). | Automatic (handled by installer) | Integrates fully and updates automatically with your system. |
| GitHub Manual | GitHub Releases Page | Selected stable release ZIP file. | Requires manual terminal command | Requires setting up shortcuts and configuration files manually. |
Method 1: Install Tilix via the Ubuntu Universe Archive (APT)
Using Ubuntu’s default software manager (APT) is the easiest way to install Tilix. When you use this method, Ubuntu does all the work for you. It downloads the app, sets up its launch icons, and makes sure it matches your system colors. Updates will also arrive automatically alongside your standard system software updates.
Make sure the Universe repository is turned on so Ubuntu knows where to find community software. Open your terminal by pressing Ctrl+Alt+T and run:
sudo add-apt-repository universe -y
Refresh your system’s package list so it registers the newly added repository files:
sudo apt update
Install Tilix on your system. Ubuntu will automatically locate and download any supporting files needed for the terminal to run:
sudo apt install tilix -y
Verify that Tilix is installed correctly and check the version information by running:
apt-cache policy tilix
Method 2: Install Tilix via the Launchpad PPA (Ubuntu Handbook)
If you are using an older version of Ubuntu (like 22.04 LTS) and want to get a newer version of Tilix (like version 1.9.6 or later), you can use a community repository (PPA) maintained by Ubuntu Handbook. Adding this repository updates your system sources, allowing you to install and update Tilix using standard package commands.
Add the community PPA to your system software sources:
sudo add-apt-repository ppa:ubuntuhandbook1/tilix -y
Update your software index files to register the new version options from the PPA:
sudo apt update
If you do not have Tilix, this command installs it. If you already have it, this command safely updates it to the PPA’s newer version:
sudo apt install tilix -y
Method 3: Install Tilix Manually via GitHub Releases
If you do not want to use repositories or need to install a specific version of Tilix, you can download its release files directly from the GitHub releases page. This manual method requires you to extract files to your root directories and run a settings command so the system can open Tilix preferences correctly.
Download the stable zip file from GitHub. To keep these steps working in the future, you can replace 1.9.5 with any newer version listed on their page:
wget https://github.com/gnunn1/tilix/releases/download/1.9.5/tilix.zip
Extract the files directly into your root directory so they are placed in the correct system folders:
sudo unzip tilix.zip -d /
Manual setups do not register settings automatically. Run this command to compile its settings database so the app preferences open correctly:
sudo glib-compile-schemas /usr/share/glib-2.0/schemas/
How to Launch and Verify Tilix on Ubuntu
Once the installation is done, you can open Tilix using your desktop menus or by using the terminal.
Press the super key (Windows key) on your keyboard to open your applications search bar, type “Tilix”, and click the app icon.
Open a default terminal window and launch Tilix by typing its name:
tilix
Check active version details:
tilix --version
How to Keep Tilix Updated and Upgraded
To make sure you have the latest features and security updates, you should update Tilix regularly. The update command depends on how you installed the app.
1. For the APT Universe and Launchpad PPA Methods:
Both methods integrate directly with your system’s software manager. You can update Tilix along with your other desktop apps by running:
sudo apt update && sudo apt upgrade tilix -y
2. For the Manual GitHub Installation Method:
Manual setups require downloading the latest ZIP file and extracting it again. Download the new archive, extract it over your existing files, and rebuild the configurations:
# Fetch new ZIP from releases page (replace 1.9.5 with the latest version as needed)
wget https://github.com/gnunn1/tilix/releases/download/1.9.5/tilix.zip

# Extract it over the existing system folders
sudo unzip -o tilix.zip -d /

# Recompile the settings database
sudo glib-compile-schemas /usr/share/glib-2.0/schemas/
Useful Tilix Keyboard Shortcuts
To use the tiling terminal layout efficiently, you can use built-in keyboard shortcuts. These allow you to split window panes, navigate between active layouts, and toggle options without using your mouse.
Advanced Configuration & Feature Spotlight
To get the most out of Tilix, you can apply custom tweaks. These will help you fix common errors, set launch shortcuts, slide the terminal down from the top of the screen, and import custom color themes.
When you open Tilix, you might see a warning message that says: “VTE configuration issue detected”. If this warning is active, Tilix cannot remember your current folder path when you split the screen. You can fix this warning easily using one of these two methods:
Method A: Enable login shell (Easiest)
Open Tilix, open Preferences from the top menu, select your profile (usually Default), click the Command tab, and check the box that says “Run command as a login shell”. Restart the app to apply the changes.
Method B: Set up vte.sh via the terminal
If you prefer using the terminal, run these commands to create a link to the required system file and add it to your shell configuration profile:
# Create a link to the standard system search path
sudo ln -sf /etc/profile.d/vte-2.91.sh /etc/profile.d/vte.sh

# Add the sourcing instructions to the end of your ~/.bashrc file
echo -e "\nif [ \$TILIX_ID ] || [ \$VTE_VERSION ]; then\n    source /etc/profile.d/vte.sh\nfi" >> ~/.bashrc
Reload your terminal profile by running source ~/.bashrc or restart your terminal window.
To configure Tilix as your system’s default terminal handler (so that pressing Ctrl+Alt+T opens Tilix instead of the default GNOME terminal), run this command:
sudo update-alternatives --config x-terminal-emulator
You will see a list of terminal options on your screen. Type the number corresponding to /usr/bin/tilix and press Enter.
Tilix includes a built-in drop-down mode that runs in the background. To make the terminal window slide down when you press a key (like F12):
- Open Ubuntu Settings and go to Keyboard > Keyboard Shortcuts.
- Scroll to the bottom and select Custom Shortcuts, then click the “+” (Add) button.
- In the box, set the Name to
Tilix Quake Mode. - Set the Command to
tilix --quake. - Click Set Shortcut, press the key you want to use (like F12), and click Add.
Pressing your chosen key will now trigger a sliding drop-down terminal window overlay from the top of your screen.
Tilix supports custom color profiles. You can create JSON-formatted theme files and place them in the directory: ~/.config/tilix/schemes/. Alternatively, you can use automated shell script installers like Gogh to choose and load themes instantly:
# Create custom schemes folder if it does not exist
mkdir -p ~/.config/tilix/schemes/

# Run the Gogh theme installer script
bash -c "$(curl -sLo- https://git.io/vQgMr)"
Once loaded, right-click inside Tilix, open Profile Preferences > Colors, and select your new theme from the color scheme dropdown menu.
How to Completely Uninstall Tilix and Clean Up Configurations
If you want to remove Tilix from your computer, run the commands below that match the method you used to install it. These commands will delete system binaries, remove repository records, and delete local user configuration files.
Remove the program binaries and dependencies matching your selected installation channel:
For APT Universe and Launchpad PPA installations:
sudo apt remove tilix -y
sudo apt autoremove --purge -y
For Manual GitHub Release installations:
Delete the extracted files from your system directories:
sudo rm -f /usr/bin/tilix
sudo rm -rf /usr/share/tilix/
sudo rm -f /usr/share/applications/com.gexperts.Tilix.desktop
sudo rm -f /usr/share/metainfo/com.gexperts.Tilix.appdata.xml
sudo rm -f /usr/share/glib-2.0/schemas/com.gexperts.Tilix.gschema.xml
Clean up PPA database records to make sure no conflicts occur on future software checks:
sudo apt install ppa-purge -y
sudo ppa-purge ppa:ubuntuhandbook1/tilix -y
Uninstalling the binary files leaves user profiles and settings intact. To perform a complete clean install, purge your settings database and delete local config folders:
# Purge settings from the system database
dconf reset -f /com/gexperts/Tilix/

# Remove custom theme and schemes files
rm -rf ~/.config/tilix/ ~/.local/share/tilix/
Finally, if you manually extracted schema configurations, recompile the system GLib database to clean up unused registries: sudo glib-compile-schemas /usr/share/glib-2.0/schemas/.
Interface Screenshots
To inspect the Tilix tiling terminal application menus, grid layouts, and configuration options on Ubuntu, refer to the screenshots gallery below:
-
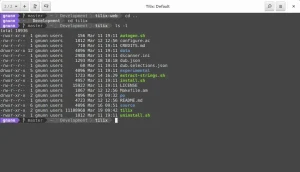
- Development screenshot from How to Install Tilix on Ubuntu 26.04 – Complete Guide
-
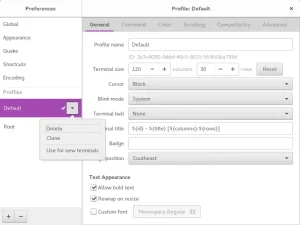
- Profile tilix from How to Install Tilix on Ubuntu 26.04 – Complete Guide
-
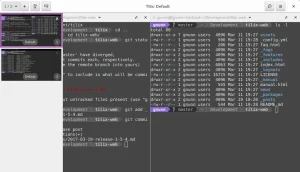
- Running commands from How to Install Tilix on Ubuntu 26.04 – Complete Guide
-
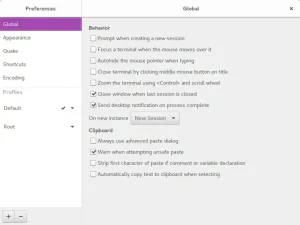
- Settings tilix from How to Install Tilix on Ubuntu 26.04 – Complete Guide
-
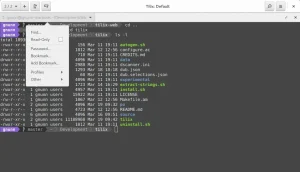
- Tilix screenshot hd from How to Install Tilix on Ubuntu 26.04 – Complete Guide
Use the links below to access the official manual, forums, user discussions, and support pages for Tilix:
- Official Tilix User Documentation: Read the complete handbook covering profiles, keybindings, and shell integration.
- Official Tilix GitHub Repository: Review the open-source code, browse current development forks, or file issue reports.
- Gogh Color Schemes Database: Browse and download hundreds of community color themes compatible with Tilix profiles.
- Ubuntu Tilix Package Search: Track active package versions and updates across active LTS releases.
Frequently Asked Questions
Is Tilix available in the default Ubuntu repositories?
Yes, Tilix is available in the default Universe repository of Ubuntu. You can install it natively using the APT package manager by running: sudo apt update && sudo apt install tilix -y.
How do I fix the “VTE configuration issue” warning in Tilix on Ubuntu?
You can resolve this warning by enabling “Run command as a login shell” in Tilix Profile Preferences, or by creating a link and sourcing the VTE script in your ~/.bashrc file: sudo ln -s /etc/profile.d/vte-2.91.sh /etc/profile.d/vte.sh && echo "source /etc/profile.d/vte.sh" >> ~/.bashrc.
How do I launch Tilix in drop-down (Quake) mode?
You can launch Tilix as a drop-down terminal by running the command: tilix --quake. To use this efficiently, map this command to a custom global keyboard shortcut (like F12) in your Ubuntu system settings.
Can I set Tilix as my default system terminal emulator on Ubuntu?
Yes, you can set Tilix as the default terminal handler by running: sudo update-alternatives --config x-terminal-emulator, and selecting the corresponding number assigned to Tilix in the terminal selection menu.
How do I apply custom color schemes and themes to Tilix?
Tilix supports custom color profiles. You can create JSON-formatted theme files and place them inside the directory: ~/.config/tilix/schemes/. Alternatively, you can use automated shell script installers like Gogh to load hundreds of community themes instantly.
Related terminal emulators: Best Terminal Emulators On Ubuntu · Install Terminator on Ubuntu · How to Set Default Terminal Emulator