

 You can install Deluge on Ubuntu using the native APT package manager with the official stable PPA, or the sandboxed Flatpak package via Flathub.
Deluge is a highly popular, lightweight, and open-source BitTorrent client. Known for its resource-efficient design, Deluge operates on a client-server architecture, allowing users to run a background daemon on headless servers and manage it remotely through Web UIs or desktop thin-client connections. This makes it a powerful alternative to clients like uTorrent and qBittorrent.
This guide provides step-by-step terminal instructions for installing and configuring Deluge on Ubuntu 26.04, 24.04, and 22.04 LTS. We cover native PPA setup, Flatpak container overrides, and headless server configuration using systemd daemon services.
If you encounter any configuration or setup errors, please feel free to drop a comment below or contact us directly for support. Our team is always here to help you get it resolved.
Official Stable PPA, Flatpak & Server Daemon Guides
Configure the ideal torrent downloading environment on your Ubuntu system. Add the developer PPA, manage Flatpak sandbox storage overrides, and establish a headless daemon service with Web UI access.
Choosing the correct installation method depends on whether you are using a desktop GUI environment or setting up a remote, headless media server. Review the comparison below to select the setup that fits your use case.
Deluge Installation Methods Compared
Review the installation options below to understand security, package sources, update frequency, and sandboxing details.
| Method | Package Source | Updates Delivery | Sandboxing & Security | System Integration |
|---|---|---|---|---|
| APT PPA (Launchpad) | Launchpad stable repository (Official) | Rapid updates directly from developer PPA | None (Unconfined local system access) | Excellent. Full disk access, standard theme matching. |
| Flatpak (Flathub) | Flathub container hub (Official) | Managed via Flatpak client updates | Strictly sandboxed container isolation | Requires filesystem overrides for custom folders. |
| Headless (deluged + Web UI) | APT / Launchpad PPA (Official) | Standard system packages updating | None (Runs under daemon system user) | Tailored for servers. Controlled via Web UI on port 8112. |
Method 1: Install Deluge via APT & Official PPA
Installing Deluge using the native package manager integrates the application with system notifications and handles magnet link associations. Adding the official stable Launchpad PPA ensures you receive version updates directly from the developers, bypassing older packages in standard repositories.
Add the official PPA to your system: (Recommended on Ubuntu 24.04 and 22.04 LTS)
sudo add-apt-repository ppa:deluge-team/stable -y
Update your local package database to retrieve package metadata from the newly added repository:
sudo apt update
Install the full desktop client suite, which includes the graphical user interface, standard plugins, and system integration helpers:
sudo apt install deluge -y
Method 2: Install Deluge via Flatpak (Flathub)
If you prefer to run applications in sandboxed environments for security, you can install the Flatpak edition. This packages all dependencies together, which is ideal if you encounter dependency issues on custom system setups. However, you must configure storage permissions to save downloads outside default sandbox folders.
If Flatpak is not yet configured, install the system daemon and set up the Flathub repository:
sudo apt install flatpak -y
flatpak remote-add --if-not-exists flathub https://dl.flathub.org/repo/flathub.flatpakrepo
Tip: If setting up Flatpak for the first time, reboot your system to reload desktop menu shortcuts.
Run the install command to download the Deluge package container from Flathub:
flatpak install flathub org.deluge_torrent.deluge -y
By default, sandboxed Flatpaks restrict access to standard paths. If you want to download torrents to external secondary drives, NAS mounts, or custom folders, run this override command:
# Replace /media/Storage with your actual downloads directory path
flatpak override --user --filesystem=/media/Storage org.deluge_torrent.deluge
Alternatively, you can manage Flatpak permissions graphically by installing the Flatseal interface configuration utility: sudo flatpak install flathub com.github.tchx84.Flatseal -y.
Method 3: Set Up a Headless Deluge Server (deluged & deluge-web)
For Ubuntu servers, you can configure Deluge to run entirely as a background service. This installation divides operations between deluged (the background daemon that handles torrent activity) and deluge-web (the web user interface that runs on port 8112). Running this under a dedicated, unprivileged system user account secures your environment.
To secure the server, create an unprivileged system user account and group named deluge to run the background processes:
sudo adduser --system --gecos "Deluge Service" --disabled-password --group --home /var/lib/deluge deluge
Install the server-specific backend components, which exclude heavy graphical desktop dependencies:
sudo apt update && sudo apt install deluged deluge-web -y
Create systemd configuration files to manage background service processes. First, create the daemon service file:
sudo nano /etc/systemd/system/deluged.service
Paste the following service configuration inside the file:
[Unit]
Description=Deluge Bittorrent Client Daemon
After=network-online.target

[Service]
Type=simple
User=deluge
Group=deluge
UMask=007
ExecStart=/usr/bin/deluged -d
Restart=on-failure
TimeoutStopSec=300

[Install]
WantedBy=multi-user.target
Next, create the Web UI service configuration file, ordering it to start after the daemon service initializes:
sudo nano /etc/systemd/system/deluge-web.service
Paste the following service configuration inside the file:
[Unit]
Description=Deluge Bittorrent Client Web Interface
After=network-online.target deluged.service
Requires=deluged.service

[Service]
Type=simple
User=deluge
Group=deluge
UMask=027
ExecStart=/usr/bin/deluge-web -d
Restart=on-failure

[Install]
WantedBy=multi-user.target
Reload systemd to recognize your custom configuration files, enable them to start automatically during boot-up, and run the services:
sudo systemctl daemon-reload
sudo systemctl enable --now deluged deluge-web
If you are using UFW (Uncomplicated Firewall) on your Ubuntu server, open the default Web UI port 8112 to permit remote dashboard connections:
sudo ufw allow 8112/tcp
Verify that the daemon services are running without errors: sudo systemctl status deluged deluge-web.
Open a web browser on a machine connected to your network and navigate to http://your-server-ip:8112 (replace your-server-ip with the server’s actual IP address, or use localhost if accessing from the host machine).
In the login dialog, type the default password: deluge (leave the username blank). Since this default password is standard across all installations, the application will display a warning dialog prompting you to update it immediately. Navigate to the Web UI options, set a strong custom password, and click save to protect your configuration.
Tip: To access downloaded files easily, add your local system account to the deluge group: sudo gpasswd -a $USER deluge. Log out and back in to apply changes.
If you prefer using a local desktop GUI to manage your remote server instead of a web browser, configure Deluge to allow remote daemon connections. First, stop the backend service and open the core configuration file:
sudo systemctl stop deluged
sudo nano /var/lib/deluge/.config/deluge/core.conf
Locate the allow_remote variable and change its value from false to true. Next, register a remote connection account in the authentication configuration file:
sudo nano /var/lib/deluge/.config/deluge/auth
Add a line containing your connection credentials, specifying a username, password, and administrative access level (10 is admin). Example: delugeadmin:strongpassword:10. Save the changes and restart the daemon service:
sudo systemctl start deluged
To connect, open the Deluge client on your local computer, open the Preferences menu, select Interface, and uncheck Classic Mode. Restart the client, click Add in the Connection Manager dialog, enter the remote server IP, daemon port 58846, and the registered credentials, then click Connect. If you are using UFW, allow connections on port 58846:
# Open remote connection port in firewall
sudo ufw allow 58846/tcp
Deluge Desktop User Interface Gallery
Below is a screenshot gallery demonstrating the active Deluge desktop user interface running on Ubuntu, showing active torrent downloads and system settings menus.
-
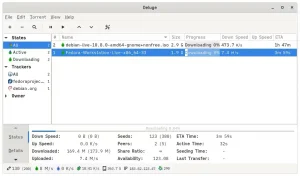
- Deluge downloading torrents example from How to Install Deluge on Ubuntu 26.04 – Complete Guide
-
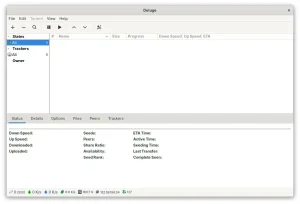
- Deluge main page desktop screenshot from How to Install Deluge on Ubuntu 26.04 – Complete Guide
Troubleshooting Common Deluge Setup Issues
If you encounter package location warnings or startup failure errors while configuring Deluge on your machine, review the troubleshooting procedures below to verify and restore your configuration.
1. Fix Missing Packages (Enable Universe Repository)
On minimal or server installations of Ubuntu, attempting to install Deluge may output an Unable to locate package deluge error. This occurs because the package is hosted in the official Ubuntu Universe repository, which might be disabled. To enable the repository and refresh your package lists, run:
sudo add-apt-repository universe -y
sudo apt update
2. Verify Headless Service Listening Ports
If the remote Web UI page fails to load, first verify that both daemon components are actively running and that the Web UI is listening on port 8112:
# Check systemd service states
systemctl is-active deluged deluge-web

# Confirm port 8112 is in a LISTEN state
ss -lntp | grep ':8112'
If your configuration files become corrupted or you lose access due to incorrect credential modifications, you can perform a clean configuration reset. Note that this will clear all user-customized settings and active download queues:
Step 1: Stop Active Services
sudo systemctl stop deluge-web deluged
Step 2: Delete Configuration Directories
# For Desktop installations
rm -rf ~/.config/deluge

# For Server installations
sudo rm -rf /var/lib/deluge/.config/deluge
Step 3: Force Reinstall Package Binaries
sudo apt update && sudo apt install --reinstall deluged deluge-web -y
Step 4: Restart Daemon Services
sudo systemctl start deluged deluge-web
How to Uninstall Deluge and Clean Up Your System
If you want to remove Deluge from your computer, execute the cleanup instructions matching your selected packaging format to remove the packages, configuration folders, system services, and PPA repositories.
Stop and purge the application packages depending on your active installation format:
For APT (Native Desktop & Server PPA) installations:
sudo apt remove deluge deluged deluge-web deluge-console -y
sudo apt autoremove --purge -y
For Flatpak (Flathub) installations:
flatpak uninstall org.deluge_torrent.deluge -y
flatpak uninstall --unused -y
For Headless Server systemd services:
sudo systemctl stop deluge-web deluged
sudo systemctl disable deluge-web deluged
sudo rm /etc/systemd/system/deluged.service /etc/systemd/system/deluge-web.service
sudo systemctl daemon-reload
sudo deluser deluge
sudo rm -rf /var/lib/deluge
If you added the deluge-team Launchpad PPA, delete it from your sources folder to keep repository updates clean:
sudo add-apt-repository --remove ppa:deluge-team/stable -y
sudo apt update
To delete all saved configuration settings, resume states, and caches, delete the configuration files matching your package manager:
# Delete native APT configurations
rm -rf ~/.config/deluge

# Delete Flatpak application caches
rm -rf ~/.var/app/org.deluge_torrent.deluge
Refer to the following resources for community support and official documentation:
Frequently Asked Questions
What is the official Deluge PPA and should I use it on Ubuntu 26.04?
The official Deluge stable repository is ppa:deluge-team/stable. Adding this repository is recommended on Ubuntu 24.04 and 22.04 LTS to receive the latest stable client releases directly from the developers. On Ubuntu 26.04 LTS, the default system repositories already contain a modern stable release, which is generally sufficient unless you specifically require an updated build not yet synced.
Why does my Flatpak Deluge client fail to access my downloads folder?
Flatpak packages run in sandboxed containers that isolate their filesystems for security. By default, the sandbox restricts Deluge from accessing external storage drives or custom download folders. You can grant access by running flatpak override --user --filesystem=/path/to/folder org.deluge_torrent.deluge in the terminal, or manage permissions graphically using the Flatseal utility.
Are there official Snap packages for Deluge in the Snap Store?
No, there are no official Snap packages maintained by the Deluge team. While community-created Snap packages exist in the Snap Store, they are often unmaintained and outdated. To ensure system stability and security, we recommend using the official stable APT PPA or Flathub Flatpak methods instead.
How do I change the default port for the Deluge Web UI from 8112?
You can change the port either through the Web UI settings panel under the Interface tab or by editing the web.conf configuration file directly. First, stop the deluge-web service by running sudo systemctl stop deluge-web. Open ~/.config/deluge/web.conf or /var/lib/deluge/.config/deluge/web.conf in a text editor, locate the port variable, update its value, save the file, and restart the service using sudo systemctl start deluge-web.
What are the default credentials for the Deluge Web UI, and are they secure?
The default login password for the Deluge Web UI is deluge, and there is no default username required. This default configuration is highly insecure. On your first login at http://your-server-ip:8112, you will be prompted to change the default password. You should immediately update it to a strong, custom password in the Web UI options to secure your daemon.
How do I grant my local Ubuntu user account access to Deluge downloads?
When running deluge under a dedicated system user account, downloaded files are owned by the deluge user and group. To access or modify these files without permission errors, add your local user account to the deluge system group by running sudo gpasswd -a $USER deluge, then log out and log back in to apply the group membership updates.
Related torrent guides: Best Torrent Clients On Ubuntu · Install qBittorrent on Ubuntu · How to Share Ubuntu Files with Windows · Install KTorrent on Ubuntu