You can install TeamViewer on Ubuntu using the official native DEB package or by configuring the modern DEB822 repository sources list.
TeamViewer is a widely used remote desktop application that enables secure screen sharing, remote control, file transfer, and web conferencing between different operating systems. For home users, TeamViewer is completely free, while commercial licenses are available for corporate environments.
This guide provides step-by-step terminal instructions for installing TeamViewer on Ubuntu 24.04 and 26.04 LTS. We cover the recommended DEB installation, modern DEB822 repository setup, and critical display server configurations required to overcome Wayland security restrictions.
If you encounter setup errors, feel free to leave a comment below or contact us directly for technical support. We are here to help you get connected.
Official DEB, DEB822 Repositories & Wayland Fixes
Configure secure remote control access on your Ubuntu machine. Bypass modern Wayland session restrictions, setup headless terminal connections, and register automatic package updates.
Choosing the correct installation method determines how TeamViewer updates are integrated into Ubuntu. Reviewing the options ensures you pick the configuration that best suits your administration preferences and security policies.
TeamViewer Installation Methods Compared
Use the comparison table below to review features, package base, repository automation, and compatibility differences.
| Method | System Integration | Updates Delivery | Security Standard | Wayland Support |
|---|---|---|---|---|
| Official DEB Package (Recommended) | Native system daemon; auto-configures traditional repository source | Integrated update (via standard APT tools) | Vendor-managed packages | Requires switching to X11 for incoming remote control |
| DEB822 Repository sources | Native system daemon; manual setup of modern key-value repository files | Integrated update (via standard APT tools) | Strict GPG signing path limits trust boundaries | Requires switching to X11 for incoming remote control |
Note: TeamViewer does not maintain official packages on the Snap Store or Flathub. This guide focuses strictly on the official native DEB and APT repository installation paths.
Resolving Wayland Compatibility & GDM Configuration Issues
Modern Ubuntu distributions, including Ubuntu 24.04 and 26.04 LTS, use Wayland as the default display server. While Wayland offers improved rendering performance and tighter security isolation between applications, this design presents significant challenges for remote desktop software.
Because Wayland prevents applications from capturing other windows or injecting synthetic keyboard and mouse inputs, incoming connections to a Wayland-based TeamViewer session will typically fail. You may experience a black screen, a “view-only” connection, or input freezes. The most reliable workaround is to configure your system to use the X11 (Xorg) display server.
You can temporarily switch your session to Xorg without modifying configuration files:
- Save your work and log out of your current session.
- On the login screen, click your username to display the password input.
- Look at the bottom-right corner of the screen and click the **gear icon**.
- Select **Ubuntu on Xorg** (or **Ubuntu on X11**) from the menu.
- Enter your password and complete the login.
You can verify that your session type has switched to X11 by running this command in your terminal:
echo $XDG_SESSION_TYPE
Expected output: x11
If the machine needs to accept unattended connections regularly, you can disable Wayland globally:
- Open the GDM3 display manager configuration file in terminal:
sudo nano /etc/gdm3/custom.conf
- Locate the line containing:
#WaylandEnable=false
- Uncomment the line by removing the leading hash character, changing it to:
WaylandEnable=false
- Save the changes and exit (press Ctrl+O, then Enter, then Ctrl+X).
- Restart the GDM3 service to apply the change (note that this will end your current GUI session immediately):
sudo systemctl restart gdm3
Connecting remotely to a headless Ubuntu machine (no physical monitor attached) requires configuring Xorg to render a virtual display. Without this configuration, you will experience a black screen even when Wayland is disabled.
Setting Unattended Access Password: You must configure a permanent remote connection password via the terminal command line interface:
sudo teamviewer passwd your_secure_password
Resolving Headless Black Screens: Connect a physical HDMI dummy plug to the graphics port of the server. This tricks the GPU into detecting an active display and hardware-accelerating the remote desktop session. Alternatively, configure a virtual frame buffer service (such as Xvfb) to allocate a software-rendered desktop environment.
Method 1: Install TeamViewer using the Official DEB Package (Recommended)
The standard way to install TeamViewer on Ubuntu is to download and execute the official `.deb` package file. The installer copies the binaries, configures a background systemd service daemon (`teamviewerd`), and automatically registers a legacy repository sources file in `/etc/apt/sources.list.d/teamviewer.list` to keep the application updated automatically.
Open a terminal session and update your local package list database to prevent conflict issues during the dependencies installation:
sudo apt update && sudo apt upgrade -y
Use the command line file downloader `wget` to fetch the installation package directly from the official TeamViewer download servers:
wget https://download.teamviewer.com/download/linux/teamviewer_amd64.deb
Install the downloaded package. We use `apt install` rather than `dpkg -i` because APT will automatically download and install required dependencies (such as libminizip1 or specific X11 libraries) from Ubuntu’s base repositories:
sudo apt install ./teamviewer_amd64.deb -y
Ensure the background service daemon is active and configured to start automatically when the system boots:
sudo systemctl enable teamviewerd.service
sudo systemctl start teamviewerd.service
Verify that the daemon is active without errors:
sudo systemctl status teamviewerd.service
Method 2: Configure the Modern DEB822 Repository Manually
Modern Ubuntu installations encourage using the DEB822 repository standard, which replaces old-style `.list` files with clear key-value structures. This approach improves security by using a local `Signed-By` keyring setting, which ensures that GPG keys only authenticate specific repositories rather than matching all packages globally. This method prevents warnings about deprecated keyrings during system updates.
Create the storage folder for local keys. Download TeamViewer’s GPG public security key, de-armor it so APT can read the binary format directly, and save it in `/usr/share/keyrings`:
sudo mkdir -p /usr/share/keyrings
curl -fsSL https://linux.teamviewer.com/pubkey/currentkey.asc | gpg --dearmor | sudo tee /usr/share/keyrings/teamviewer-keyring.gpg > /dev/null
Create a new repository configuration file named `teamviewer.sources` under the APT directory. Open the editor:
sudo nano /etc/apt/sources.list.d/teamviewer.sources
Paste the following structured key-value parameters into the configuration file:
Types: deb
URIs: https://linux.teamviewer.com/deb
Suites: stable
Components: main
Signed-By: /usr/share/keyrings/teamviewer-keyring.gpg
Save the file and exit the editor by pressing Ctrl+O, Enter, then Ctrl+X.
Update your APT cache to read the newly configured repository settings, then install the latest stable TeamViewer package version:
sudo apt update && sudo apt install teamviewer -y
Snap and Flatpak Packages Status & Limitations
Unlike many desktop applications on Ubuntu, TeamViewer does not maintain official packages in the Snap Store or on Flathub. Understanding why these formats are unsupported helps you evaluate remote connection alternatives.
Snaps run in a restricted AppArmor sandbox. Because a remote desktop app requires access to global screen capture interfaces and keyboard/mouse event injection portals, a standard “strict” snap cannot function without explicit system interfaces. An unofficial Snap would require risky “classic” (unconfined) system permissions to perform remote control tasks.
Flatpaks are designed to isolate application environments. TeamViewer requires a persistent systemd daemon (`teamviewerd`) running in the background with root privileges, which conflicts with Flatpak’s user-space execution model. For remote connections via Flatpak, open-source options like RustDesk are available directly on Flathub.
TeamViewer User Interface & Screenshots
Below is a screenshot gallery demonstrating the active TeamViewer user interface and remote control options running on Ubuntu Desktop.
-
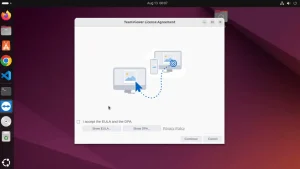
- Screenshot of teamviewer showing first screen from How to Install TeamViewer on Ubuntu 26.04 – Complete Guide
-

- Screenshot teamviewer on ubuntu hd from How to Install TeamViewer on Ubuntu 26.04 – Complete Guide
TeamViewer Video Installation Guide
If you prefer a visual walkthrough, you can watch our step-by-step video tutorial demonstrating the DEB installation process and how to resolve the Wayland black screen issue on Ubuntu:
How to Completely Uninstall TeamViewer and Revert System Changes
If you need to remove TeamViewer from your Ubuntu machine, you must ensure that you completely revert all system modifications, disable the background system services, and remove repository configs to prevent update errors.
Deactivate the background daemon to ensure no processes remain active in the system memory:
sudo systemctl stop teamviewerd.service
sudo systemctl disable teamviewerd.service
Purge the application files. Purging removes the package binaries and its system configuration settings files:
sudo apt purge teamviewer -y
Remove the repository files and security GPG keys to clean up your sources directory:
sudo rm -f /etc/apt/sources.list.d/teamviewer.list
sudo rm -f /etc/apt/sources.list.d/teamviewer.sources
sudo rm -f /usr/share/keyrings/teamviewer-keyring.gpg
Run system autoremove to clean up any leftover dependency libraries that are no longer required by other applications:
sudo apt autoremove --purge -y
Remove the leftover log files and custom configurations saved under your home directory:
rm -rf ~/.config/teamviewer
rm -rf ~/.local/share/teamviewer
Use the external resources below to access official community support and additional documentation files:
Frequently Asked Questions
Why does TeamViewer show a black screen or block input on Ubuntu?
This issue is caused by the Wayland display server, which is enabled by default in Ubuntu 24.04 and 26.04. Wayland’s security architecture isolates applications and blocks external programs from capturing the screen or injecting remote keyboard and mouse inputs. Switching to the X11 (Xorg) display server resolves this issue.
How do I switch from Wayland to Xorg (X11) on Ubuntu?
You can switch sessions at the GDM login screen. Click your username, click the gear icon in the bottom-right corner, select “Ubuntu on Xorg” (or “Ubuntu on X11”), and log in. Alternatively, you can permanently disable Wayland by editing /etc/gdm3/custom.conf and uncommenting WaylandEnable=false.
Is there an official Snap or Flatpak package for TeamViewer?
No, there are no official Snap or Flatpak packages for TeamViewer. TeamViewer requires a system-level background service daemon (teamviewerd) running with root privileges to control system display inputs, which is incompatible with the default sandboxing restrictions of Snap and Flatpak.
How do I update TeamViewer on Ubuntu?
When you install the official TeamViewer DEB package or configure the DEB822 sources list, TeamViewer automatically adds its repository to your system. You can update TeamViewer along with other system packages by running sudo apt update && sudo apt upgrade in your terminal.
Can I run TeamViewer on a headless Ubuntu server?
Yes, TeamViewer supports headless configurations. You must install the native package, ensure the background service is running, and set a static remote password using the command sudo teamviewer passwd [your_password]. For display rendering, you may also need to connect a physical HDMI dummy plug or configure a virtual frame buffer like Xvfb.
More remote connection and collaboration guides: AnyDesk on Ubuntu · Zoom on Ubuntu · Best Remote Desktop Software · Remmina on Ubuntu