
 You can install Shotcut on Ubuntu using the official Snap package with classic confinement, the containerized Flatpak package from Flathub, the standalone AppImage executable, or the native Ubuntu Universe repository (APT).
Shotcut is a free, open-source, cross-platform video editor built on the MLT Multimedia Framework and utilizing Qt for its interface.
It supports a wide range of video, audio, and image formats via FFmpeg, and features native timeline editing, multi-format resolutions, color grading, audio mixing, and GPU-accelerated video effects. Many content creators rate Shotcut as one of the best free alternatives to proprietary video editors on Linux.
This guide provides step-by-step terminal instructions to install and configure Shotcut on Ubuntu 26.04, 24.04, and 22.04 LTS.
We cover Snap classic confinement rules, Flatpak sandbox directory permission overrides, AppImage desktop integration, native APT installation limits, and how to verify hardware acceleration settings.
If you run into any issues during setup, please leave a comment below or contact us directly for assistance.
Snap, Flatpak, AppImage, & APT Setup Walkthroughs
Configure the Shotcut video editor on your system. Learn how to choose the right package, configure sandbox paths, map custom shortcuts, and optimize GPU-accelerated hardware encoding.
libfuse2 package is a required prerequisite.Choosing the correct package format determines how easily Shotcut integrates with your system’s hardware codecs and graphics card drivers. While the portable formats guarantee the latest upstream version, the native repository package offers better compatibility with standard system themes. Review the comparison matrix below to determine the best method for your system configuration.
Shotcut Installation Methods Compared
Weigh the confinement levels, update frequencies, hardware integration, and version ranges for each installer type on Ubuntu desktop.
| Method | Source Channel | Isolation Confinement | Hardware/GPU Access | Ubuntu Version Matrix |
|---|---|---|---|---|
| Snap (Snap Store) | Official Snap Store | Classic Confinement | Full hardware access, auto NVENC/VAAPI driver mapping. | Latest stable release (v26.06.x or newer) |
| Flatpak (Flathub) | Flathub Registry | Sandbox Isolation | Requires manual storage overrides for external file exports. | Latest stable release (v26.06.x or newer) |
| AppImage | GitHub Releases | None (Portable native) | Direct native GPU driver bindings, requires libfuse2. |
Latest stable release (v26.06.x or newer) |
| APT Universe | Ubuntu Universe Archive | None (System native) | Direct system library calls, no sandboxing. | 26.04: v26.01.x 24.04: v24.02.x 22.04: *Not available* |
Method 1: Install Shotcut via the Snap Store (Recommended)
The officially recommended method for Ubuntu users is the Snap package. Maintained directly by Shotcut’s developers, the Snap ensures that application dependencies and system libraries do not conflict. Because Shotcut requires access to video rendering libraries, raw storage devices, and system graphical subsystems, the Snap utilizes classic confinement. This grants the editor full, unrestricted access to host resources, avoiding performance penalties during rendering cycles.
Open a terminal window (Ctrl+Alt+T) and install Shotcut. The --classic flag is mandatory to allow classic security confinement overrides:
sudo snap install shotcut --classic
Ensure the installation completed successfully by listing Shotcut’s active snap environment details:
snap info shotcut
Method 2: Install Shotcut via Flatpak (Flathub)
If you prefer containerized setups that isolate files from your system registries, Flathub’s Flatpak build is an outstanding choice. Because Flatpaks run inside an isolated sandbox boundary, filesystem access is limited. If you work with raw media assets on external storage partitions, secondary drives, or networks, you will need to grant system directory access via Flatpak overrides.
If Flatpak daemon support is not configured on your desktop, install it from the base system repository:
sudo apt update && sudo apt install flatpak -y
Register Flathub’s repository index to search and fetch container builds:
flatpak remote-add --if-not-exists flathub https://dl.flathub.org/repo/flathub.flatpakrepo
Execute the Flathub installation script. Flatpak will pull shared graphical runtime libraries if they are not yet installed:
flatpak install flathub org.shotcut.Shotcut -y
By default, Shotcut cannot access locations outside your home folder structure. To allow the container full write access to external drives mounted at /media (or folders like /mnt), run this override command:
flatpak override --user --filesystem=/media org.shotcut.Shotcut
Method 3: Install Shotcut via Portable AppImage
If you prefer executing applications directly without registering packages on system channels, the portable AppImage is the best choice. It bundles all shared graphical assets and specific video filters into a single executable binary. Since modern Ubuntu LTS versions deprecate legacy user-space filesystem libraries, you must manually install the libfuse2 package before launching the file.
Ensure your Ubuntu workspace supports running portable app files by downloading the FUSE module:
sudo apt update && sudo apt install libfuse2 -y
Create a local applications directory inside your home directory and download Shotcut’s stable release (using v26.06.25 as our baseline example) from GitHub. We rename it to shotcut.appimage during download to simplify launcher configuration:
mkdir -p ~/.local/bin
cd ~/.local/bin
wget -O ~/.local/bin/shotcut.appimage https://github.com/mltframework/shotcut/releases/download/v26.06.25/shotcut-linux-x86_64-260625.AppImage
Enable executable rights for the downloaded binary package:
chmod +x ~/.local/bin/shotcut.appimage
To list Shotcut with its official logo in your applications grid, write a desktop configuration shortcut file:
nano ~/.local/share/applications/shotcut-appimage.desktop
Paste these configuration specifications inside the editor, replacing yourusername with your actual system username. Save (Ctrl+O, Enter) and exit (Ctrl+X):
[Desktop Entry]
Name=Shotcut (AppImage)
Comment=Free, open-source video editor
Exec=/home/yourusername/.local/bin/shotcut.appimage %F
Icon=shotcut
Type=Application
Categories=AudioVideo;Video;Recorder;
MimeType=application/x-shotcut;video/mp4;video/quicktime;
Terminal=false
StartupNotify=true
Finally, rebuild the system launcher indexes using the desktop utility command: update-desktop-database ~/.local/share/applications/.
Method 4: Install Shotcut via Ubuntu Repositories (APT)
If you prefer system-native dependency management and want to avoid third-party packages, Shotcut is available in the Ubuntu **Universe** repository. Be aware that stable LTS repositories freeze versions upon system release. For instance, Ubuntu 26.04 LTS carries Shotcut v26.01.x, while Ubuntu 24.04 LTS contains v24.02.x. Shotcut is not packaged in the repositories for Ubuntu 22.04 LTS. If you need the latest editing features (like the new HDR preview fullscreen mode), use the Snap or Flatpak methods instead.
Ensure the Universe repository component is activated on your workstation:
sudo add-apt-repository universe -y
Update local software index catalogs:
sudo apt update
Install Shotcut from the system repository. APT will handle dependency resolutions automatically:
sudo apt install shotcut shotcut-data -y
How to Enable GPU Hardware Acceleration in Shotcut
Shotcut supports hardware encoding and decoding using your GPU to speed up exports and smooth out timeline playback. If you are editing high-resolution video streams (like 4K), mapping GPU libraries is crucial. Follow these configurations inside the Shotcut interface:
1. Launch Shotcut on your desktop.
2. Open the Settings top menu and verify that the GPU Effects checkbox is enabled (uses OpenGL for preview processing).
3. To enable GPU rendering during exports, select Export in the top toolbar to open the export options panel.
4. Under the Export options, check the box for Use hardware encoder.
5. Click the Configure button next to the checkbox, and click Detect. Shotcut will analyze your system drivers and display active codec profiles (e.g., h264_vaapi or hevc_vaapi for Intel/AMD graphics, and h264_nvenc or hevc_nvenc for NVIDIA cards).
How to Completely Uninstall Shotcut and Remove Cache Files
If you need to remove Shotcut or clean up temporary configuration files before switching packages, execute the cleanup instructions that correspond to your active installation method. Purging leftover directories protects against library conflicts.
Purge the snap configuration files and remove the application binary:
sudo snap remove shotcut
Uninstall the Flatpak application and remove orphaned container runtimes:
flatpak uninstall org.shotcut.Shotcut -y
flatpak uninstall --unused -y
Delete the executable file and purge the local desktop shortcut launcher:
rm ~/.local/bin/shotcut.appimage
rm ~/.local/share/applications/shotcut-appimage.desktop
update-desktop-database ~/.local/share/applications/
Purge the application package configurations and clean up dependencies:
sudo apt purge shotcut shotcut-data -y
sudo apt autoremove -y
Uninstalling the software leaves configuration folders in your home directory. To delete all local project profiles, history logs, and layout cache files, execute this command:
rm -rf ~/.config/Meltytech/ ~/.local/share/Meltytech/ ~/.var/app/org.shotcut.Shotcut/
Interface Screenshots
Once Shotcut is installed on your Ubuntu desktop, you will see the multi-track video editing timeline, transition filters, and export presets configured as shown in the interface screenshots below:
-
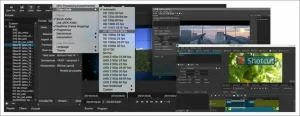
- Editing group shotcut linux from How to Install Shotcut on Ubuntu 26.04 – Complete Guide
-
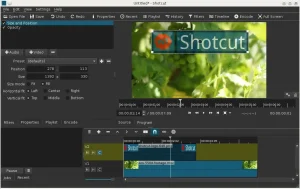
- Hd screenshot of shotcut on ubuntu from How to Install Shotcut on Ubuntu 26.04 – Complete Guide
-
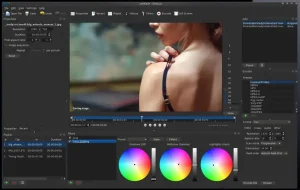
- Shotcut editing image from How to Install Shotcut on Ubuntu 26.04 – Complete Guide
-
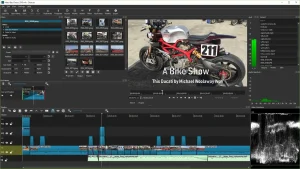
- Shotcut screenshot from How to Install Shotcut on Ubuntu 26.04 – Complete Guide
-
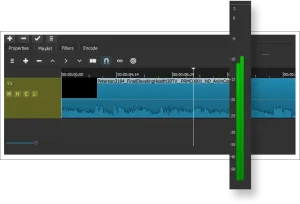
- Waveforms shotcut from How to Install Shotcut on Ubuntu 26.04 – Complete Guide
Shotcut on Ubuntu FAQ
What is the recommended way to install Shotcut on Ubuntu?
The Shotcut team officially recommends using the Snap or Flatpak packages to ensure you always have the latest stable video editing features, codecs, and updates. The Snap package runs in classic confinement to grant full access to system folders and GPU encoders.
How do I enable hardware acceleration in Shotcut on Ubuntu?
Open Shotcut, go to Settings, and check the box next to Use GPU Effects. Additionally, when exporting video, check the Use hardware encoder option in the Export panel, and click Configure to verify support for VAAPI (Intel/AMD) or NVENC (NVIDIA).
How do I grant the Shotcut Flatpak permission to access files on external drives?
Because Flatpak packages run inside a secure container sandbox, they cannot access external partitions by default. Run the terminal override command: flatpak override --user --filesystem=/media org.shotcut.Shotcut.
Do I need to install FUSE to run the Shotcut AppImage on Ubuntu?
Yes, on Ubuntu 22.04 LTS and newer releases, you must install the legacy FUSE user-space filesystem library before launching the AppImage by running: sudo apt update && sudo apt install libfuse2 -y.
How do I completely remove Shotcut and clean up all configuration files?
Purge the software using the package manager that matches your install method, and then remove the user profile cache directories: rm -rf ~/.config/Meltytech ~/.local/share/Meltytech ~/.var/app/org.shotcut.Shotcut.
More media editor guides: Best Video Editors on Ubuntu · Install GIMP on Ubuntu · Install Krita on Ubuntu · Install Blender on Ubuntu · Install FFmpeg on Ubuntu