


Beekeeper Studio is a modern, fast, and easy-to-use database manager and SQL editor that supports MySQL, PostgreSQL, SQLite, SQL Server, and other popular database engines. Unlike legacy managers that feel cluttered and dated, Beekeeper Studio provides a clean, responsive interface designed to streamline your database development and administration workflows.
This guide provides step-by-step installation instructions for Ubuntu 24.04 and 26.04 LTS, along with comparison tables, troubleshooting steps, and custom interface overrides. If you encounter any installation errors or repository keyring signature issues on your system, please drop a comment below or contact us for support. We are always here to help you get your developer environment running smoothly.
APT, Snap, Flatpak & AppImage Guide
Configure the Beekeeper Studio SQL editor on your Ubuntu desktop. Compare native repository performance against container sandboxes, resolve AppImage dependencies, and configure SQLite overrides.
Choosing the right packaging format determines how Beekeeper Studio is isolated on your desktop, how database ports are accessed, and how system files (like SSH keys and SQLite databases) are integrated. The comparison table below details the technical trade-offs of each method.
Beekeeper Studio Installation Methods Compared
Compare sandboxing, package verification, update mechanisms, and developer support across the available packaging options.
| Method | Sandboxed | Keyring Location | Updates | Maintained By |
|---|---|---|---|---|
| Native APT (Recommended) | No (Direct performance) | /etc/apt/keyrings/ (Modern) | System Updates (APT) | Beekeeper Team (Official) |
| Official Snap | Yes (Strict sandbox) | Snap Store Keyring | Automatic Background | Beekeeper Team (Official) |
| Flatpak | Yes (Isolated sandbox) | Flathub Keyring | System Updates (Flatpak) | Community Contributed |
| AppImage (Portable) | No (Needs host libraries) | N/A (Self-signed binary) | Manual Download | Beekeeper Team (Official) |
Method 1: Install Beekeeper Studio via Official APT Repository (Recommended)
Using the official APT repository is the native installation method recommended for most developers. Installing the native package directly on your system ensures maximum performance and integrates the app launcher with your desktop environment. Because the files are installed directly on your system, the application has full access to local network ports and directories, avoiding the file access restrictions that can affect sandboxed container formats.
Modern Ubuntu configurations (including 24.04 and 26.04 LTS) mandate secure keyring management. Rather than putting the key in the shared trusted keys folder, signing files must be isolated. This setup utilizes a secure keyring path and a structured, clean DEB822 repository configuration file.
Ensure the directory for isolated third-party repository signatures exists. This path shields the system’s package database from unauthorized keys:
sudo mkdir -p /etc/apt/keyrings
Download the developer’s secure signing key, convert it into a format that Ubuntu’s package manager (APT) can read, and save it in the designated keyrings folder:
curl -fsSL https://deb.beekeeperstudio.io/beekeeper.key | sudo gpg --dearmor -o /etc/apt/keyrings/beekeeper-archive-keyring.gpg
Apply universal read permissions to the exported keyring file to ensure the package catalog can read the signature during updates:
sudo chmod go+r /etc/apt/keyrings/beekeeper-archive-keyring.gpg
Write the repository setup configuration. The modern DEB822 format organizes repository addresses and security keys in a clean, structured list. This modern format replaces the older single-line layout to prevent repository configuration conflicts:
echo -e "Types: deb\nURIs: https://deb.beekeeperstudio.io\nSuites: stable\nComponents: main\nSigned-By: /etc/apt/keyrings/beekeeper-archive-keyring.gpg" | sudo tee /etc/apt/sources.list.d/beekeeper-studio.sources > /dev/null
Run the package list update command to detect the new sources configuration, and install the database client:
sudo apt update
sudo apt install beekeeper-studio -y
Note: The deb package automatically creates a fallback legacy configuration file in `/etc/apt/sources.list.d/beekeeper-studio-app.list` during installation. To prevent duplicate source warnings during system updates, remove this legacy list file:
sudo rm -f /etc/apt/sources.list.d/beekeeper-studio-app.list
Method 2: Install Beekeeper Studio via Snap Store (Convenience Sandbox)
The Snap package is an official release maintained by the Beekeeper Studio team. Snaps are self-contained packages that include all the files and drivers the application needs to run. Updates are downloaded and applied in the background automatically, keeping your database manager up to date.
Because Snap packages run in a secure sandbox, they are isolated from your system’s personal configurations. If you use SSH keys to connect to remote databases, you must manually connect the Snap SSH interface after installation to allow Beekeeper Studio to access your SSH keys.
Run the snap installer command in your system shell. Confinement is strict, so no override flags are required during setup:
sudo snap install beekeeper-studio
Allow the sandboxed package to read your user directory SSH configurations to authenticate database tunnels:
sudo snap connect beekeeper-studio:ssh-keys :ssh-keys
Method 3: Install Beekeeper Studio via Flatpak (Flathub)
Flatpak is another containerized installation option. The Flatpak version is community-maintained and runs inside an isolated sandbox. This layout isolates the application from your host system to protect your personal files and credentials. If you prefer using Flatpak and Flathub on your desktop, you can install the package using the commands below.
If Flatpak is not yet active on your Ubuntu desktop, install the daemon, register the Flathub server remote, and run the client install command:
sudo apt update
sudo apt install flatpak -y
sudo flatpak remote-add --if-not-exists flathub https://dl.flathub.org/repo/flathub.flatpakrepo
flatpak install flathub io.beekeeperstudio.Studio -y
Method 4: Install Beekeeper Studio via AppImage (Portable)
AppImage is a portable installation method supported by the developers. An AppImage is a single file that runs instantly without modifying your system’s package registry. This makes it a great choice if you need to run Beekeeper Studio without administrator privileges. Because AppImages do not update automatically, you must download the latest file manually when updates are released.
Note: Ubuntu 24.04 and 26.04 LTS do not include the `libfuse2` library by default. This library is required to run AppImage files on modern Linux systems. AppImage packages will fail to open and close silently on launch unless you install this library first.
1. Install the required user-space filesystem dependency from the Ubuntu repository list:
sudo apt update
sudo apt install libfuse2 -y
2. Download the latest `.AppImage` release file from the Beekeeper Studio releases repository. Navigate to the download folder in your terminal and modify permissions to grant the file run access:
chmod +x Beekeeper-Studio-*.AppImage
3. Execute the binary to launch the application interface directly from your current path:
./Beekeeper-Studio-*.AppImage
Beekeeper Studio Video Guide

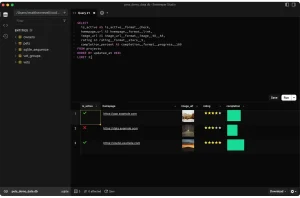
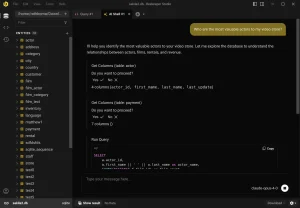
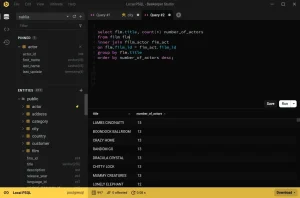
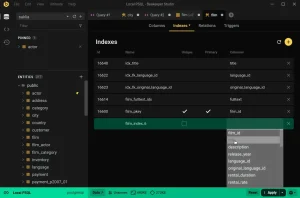
Beekeeper Studio Screenshots

Troubleshooting Common Setup Issues
If you encounter layout, database connectivity, or keyring security errors, check the troubleshooting solutions below to resolve them.
Due to sandbox isolation, the Flatpak version of Beekeeper Studio cannot access database files stored on your host system (such as project files in your home directory or custom mounting paths). Grant the flatpak permission to browse the host filesystem:
flatpak override io.beekeeperstudio.Studio --filesystem=host
On modern Ubuntu systems running GNOME on Wayland, Electron applications like Beekeeper Studio may look blurry or fail to scale correctly when using fractional display settings. You can resolve this issue by forcing the Electron runtime to launch in native Wayland mode. Create a configuration file in your home path:
mkdir -p ~/.config
echo -e "--ozone-platform-hint=auto\n--enable-features=UseOzonePlatform" > ~/.config/bks-flags.conf
If you see repository signature warnings during update runs, it is likely that the keyring directory was not registered correctly or legacy keys exist. Clear duplicate lists and re-install the signature keyring file:
sudo rm -f /etc/apt/sources.list.d/beekeeper-studio-app.list
sudo rm -f /usr/share/keyrings/beekeeper.gpg
sudo apt update
If a configuration conflict or corrupt workspace prevent Beekeeper Studio from opening or loading, you can reset the application by purging the configuration folders. This resets your connection profiles and returns the client to factory defaults:
# For Native APT & AppImage Installations
rm -rf ~/.config/beekeeper-studio ~/.cache/beekeeper-studio

# For Flatpak Installations
rm -rf ~/.var/app/io.beekeeperstudio.Studio

# For Snap Installations
rm -rf ~/snap/beekeeper-studio
Warning: Resetting deletes saved connection configurations, passwords, and custom preferences. Back up these directories before executing the commands.
How to Uninstall Beekeeper Studio from Ubuntu
If you need to remove Beekeeper Studio from your system or revert repository configurations, follow the commands matching your original installation format.
1. For the Native APT Repository Method:
Purge the binary package files, delete the repository sources config, remove the isolated keyring file, and rebuild your system’s package cache index:
sudo apt purge beekeeper-studio -y
sudo rm -f /etc/apt/sources.list.d/beekeeper-studio.sources
sudo rm -f /etc/apt/keyrings/beekeeper-archive-keyring.gpg
sudo apt update
2. For the Snap Store Package:
Uninstall the snap package and purge associated sandbox caches:
sudo snap remove --purge beekeeper-studio
3. For the Flatpak Package:
Remove the flatpak and delete its container variables directory:
flatpak uninstall io.beekeeperstudio.Studio -y
rm -rf ~/.var/app/io.beekeeperstudio.Studio
4. For the Portable AppImage:
Remove the downloaded AppImage package file and clean local configuration paths:
rm -f beekeeper-studio-*.AppImage
rm -rf ~/.config/beekeeper-studio
Frequently Asked Questions
Is Beekeeper Studio free to use on Ubuntu?
Beekeeper Studio Community Edition is free and open source. They also offer a paid Ultimate Edition with advanced commercial features like Oracle Database integration, Cassandra support, and team sharing.
How do I access local SQLite databases in the Flatpak version of Beekeeper Studio?
Since Flatpak runs in a sandbox, it cannot access files on your host system by default. You can grant access to host folders by running sudo flatpak override io.beekeeperstudio.Studio –filesystem=host in your terminal.
Why does the AppImage version fail to open on Ubuntu 24.04 / 26.04?
Ubuntu 24.04 and 26.04 LTS do not include the legacy libfuse2 package by default, which is required to run AppImages. To fix this, run the command sudo apt install libfuse2 -y in your terminal.
How do I upgrade Beekeeper Studio on Ubuntu?
For APT, run sudo apt update && sudo apt upgrade. For Snap, the package updates in the background automatically, or you can force it with sudo snap refresh beekeeper-studio. For Flatpak, run flatpak update. For AppImage, you must download the new version manually from the website.
What databases are supported by Beekeeper Studio?
The free Community Edition supports PostgreSQL, MySQL, MariaDB, SQLite, SQL Server, Redshift, CockroachDB, TiDB. Paid editions add MongoDB, Oracle, Cassandra, Trino, and Presto.
- Beekeeper Studio Official Website – Download links, user manuals, and pricing tier descriptions.
- Beekeeper Studio Documentation – Detailed documentation on GPG verification and configurations.
- UbuntuFree Support & Contact Page – Contact our developer support team if you experience system errors.
More developer application guides: Best Ubuntu Code Editors · Sublime Text Installation · Docker CE Setup · How to install Android Studio on Ubuntu · Install FFMpeg for Ubuntu