


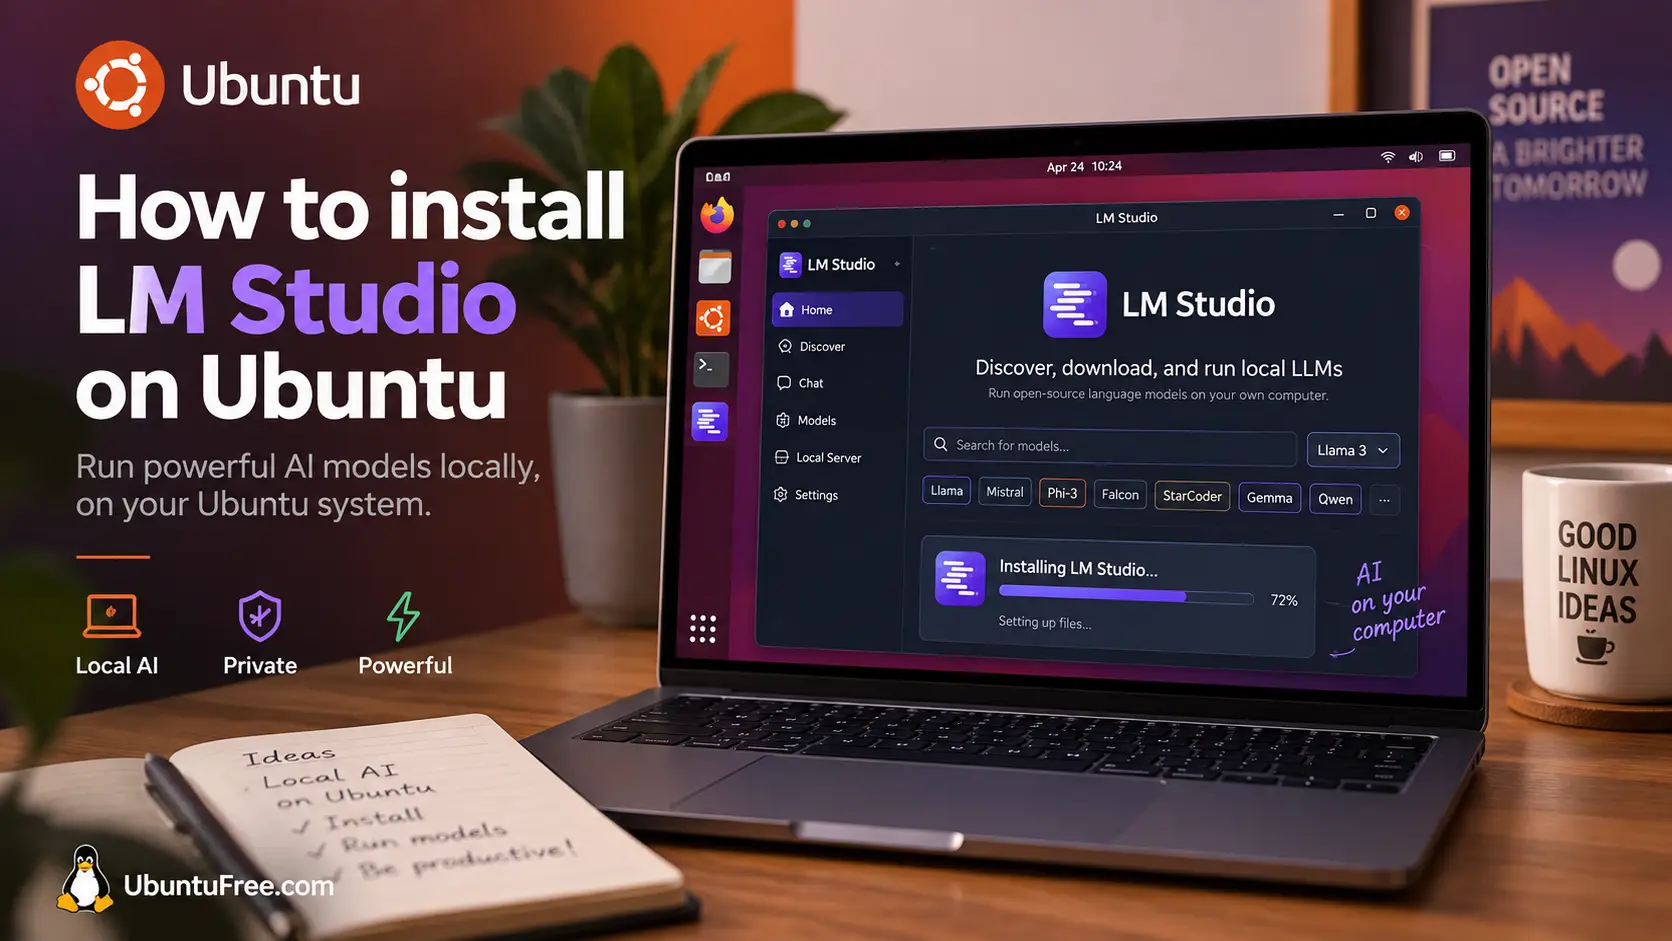
Install LM Studio on Ubuntu
To install LM Studio on Ubuntu, download the .deb package from the official site and install it with sudo apt install ./LM-Studio-*.deb. There is also an AppImage if you would rather not install anything, and it is the only option on ARM64 machines.
LM Studio is a desktop application that downloads AI models and runs them on your own computer. It has a search page for finding models, a chat window for talking to them, and a panel for your graphics card, and it does not need Ollama, Docker or a terminal. This guide covers both download options, your first model, the built-in server, and the two errors that stop the AppImage starting. If a step does not work on your system, leave a comment below or contact us and we will help you sort it out.
Which File to Download
Take the .deb unless you are on an ARM machine. It installs like any other Ubuntu package, puts LM Studio in your applications menu, and updates and removes with apt the way everything else on your system does.
| File | Machine | What you get | Pick it when |
|---|---|---|---|
| .deb package | Intel or AMD (x64) | An entry in your applications menu, managed by apt | Almost always. It behaves like every other app you install. |
| AppImage | Intel or AMD (x64) | A single file you run directly, installing nothing | You want to try it and delete one file afterwards. |
| AppImage (ARM64) | ARM, such as a Raspberry Pi or an Ampere box | The same single file, built for ARM | You are on ARM. There is no .deb for these machines. |
Not sure which machine you have? Run uname -m. It prints x86_64 on Intel and AMD, and aarch64 on ARM.
Install LM Studio on Ubuntu
Three steps for the .deb, and a fourth card if you chose the AppImage.
Step 1: Check your processor supports AVX2
This takes one command and it is worth doing first, because it is the one requirement that cannot be worked around. Open a terminal and run:
mike@ubuntu:~$ grep -o avx2 /proc/cpuinfo | head -1

avx2
If it prints avx2, you are fine. If it prints nothing at all, your processor does not have the instruction set LM Studio is built against, and the app will not run on this machine no matter which file you download. That generally means a processor from around 2013 or earlier. On an ARM machine this command prints nothing and that is expected, because AVX2 is an Intel and AMD feature.
Step 2: Download the package
Go to the LM Studio download page in your browser and choose the Linux build for your machine. The page offers the .deb and the AppImage side by side, and the file lands in your Downloads folder.
Nothing is asked of you before the download. No account, no email address, no licence key. The file is around 1GB, because the application brings its own model runtimes with it rather than fetching them later.
Step 3: Install it
Double click the .deb in your Files window and Ubuntu’s software installer opens with an Install button. That is the whole step, and if it worked you can skip to the next section.
If double clicking does nothing, which happens on some desktops, the terminal does the same job in one line:
mike@ubuntu:~$ cd ~/Downloads

mike@ubuntu:~/Downloads$ sudo apt install ./LM-Studio-*.deb
The ./ in front of the filename matters. Without it, apt looks for a package called LM-Studio in the Ubuntu archives, does not find one, and tells you so. The star means you do not have to type the version number. Once it finishes, LM Studio is in your applications menu like anything else.
Step 4, only if you chose the AppImage
An AppImage arrives without permission to run, so you grant it and then start it:
mike@ubuntu:~$ cd ~/Downloads

mike@ubuntu:~/Downloads$ chmod +x LM-Studio-*.AppImage

mike@ubuntu:~/Downloads$ ./LM-Studio-*.AppImage
If the window opens, you are done. If instead you get an error about FUSE or about the sandbox, both are known ones with a one-line fix in When It Will Not Start. An AppImage also leaves nothing in your applications menu, so you start it this way each time unless you add a launcher yourself.

The same three routes in the same order, shown on an Ubuntu desktop.
What the App Does
LM Studio is one program that finds models, downloads them, and runs them. Everything happens in a window you open from your applications menu, and the models run on your own hardware once they are downloaded.
The search page measures every model against the memory in your machine, so you can see before you download whether it will run comfortably, run slowly, or not load at all. Nothing else in this guide saves you as much wasted time.
You search the same public library everyone else uses, from inside the app, and click download. There is no separate account, no command to type, and nothing to configure first.
Conversations are listed down the side and you can reopen one from last week. You can also run two chats beside each other, which is the quickest way to see how two models answer the same question.
The internet is used to download the app and the models. After that the answers come from your own processor or graphics card, and you can unplug the network and keep chatting.
It is a replacement for the whole stack, not an addition to it. If you have read the rest of our local AI guides, those all install Ollama first and then run models through it. LM Studio does both jobs itself, so you do not need Ollama installed for any of what follows.
Your First Model
The app is empty until you download a model. Open LM Studio, click the search icon in the left sidebar, and type a name or browse what is popular.
Every result shows its size and how that compares with the memory in your machine. Trust that indication. Downloading a model too large for your hardware is the most common way a first attempt goes wrong.
Something between 3 and 8 billion parameters, marked 4-bit. Those run between roughly 2GB and 5GB and answer quickly on an ordinary laptop. Qwen, Llama, Gemma, Mistral and DeepSeek are the names to look for, and our guide to picking the Qwen size your machine can run explains the numbers if you want them. DeepSeek is the one that shows its working before answering.
Click download and it arrives in the background. Models live in ~/.lmstudio/models, which you can point at another drive in the app’s settings.
Chat With It
Open the chat icon in the sidebar, choose your model in the picker at the bottom of the message box, and type. The first message of a session takes a few seconds longer, because the model is being loaded into memory. After that it answers as fast as your hardware allows.
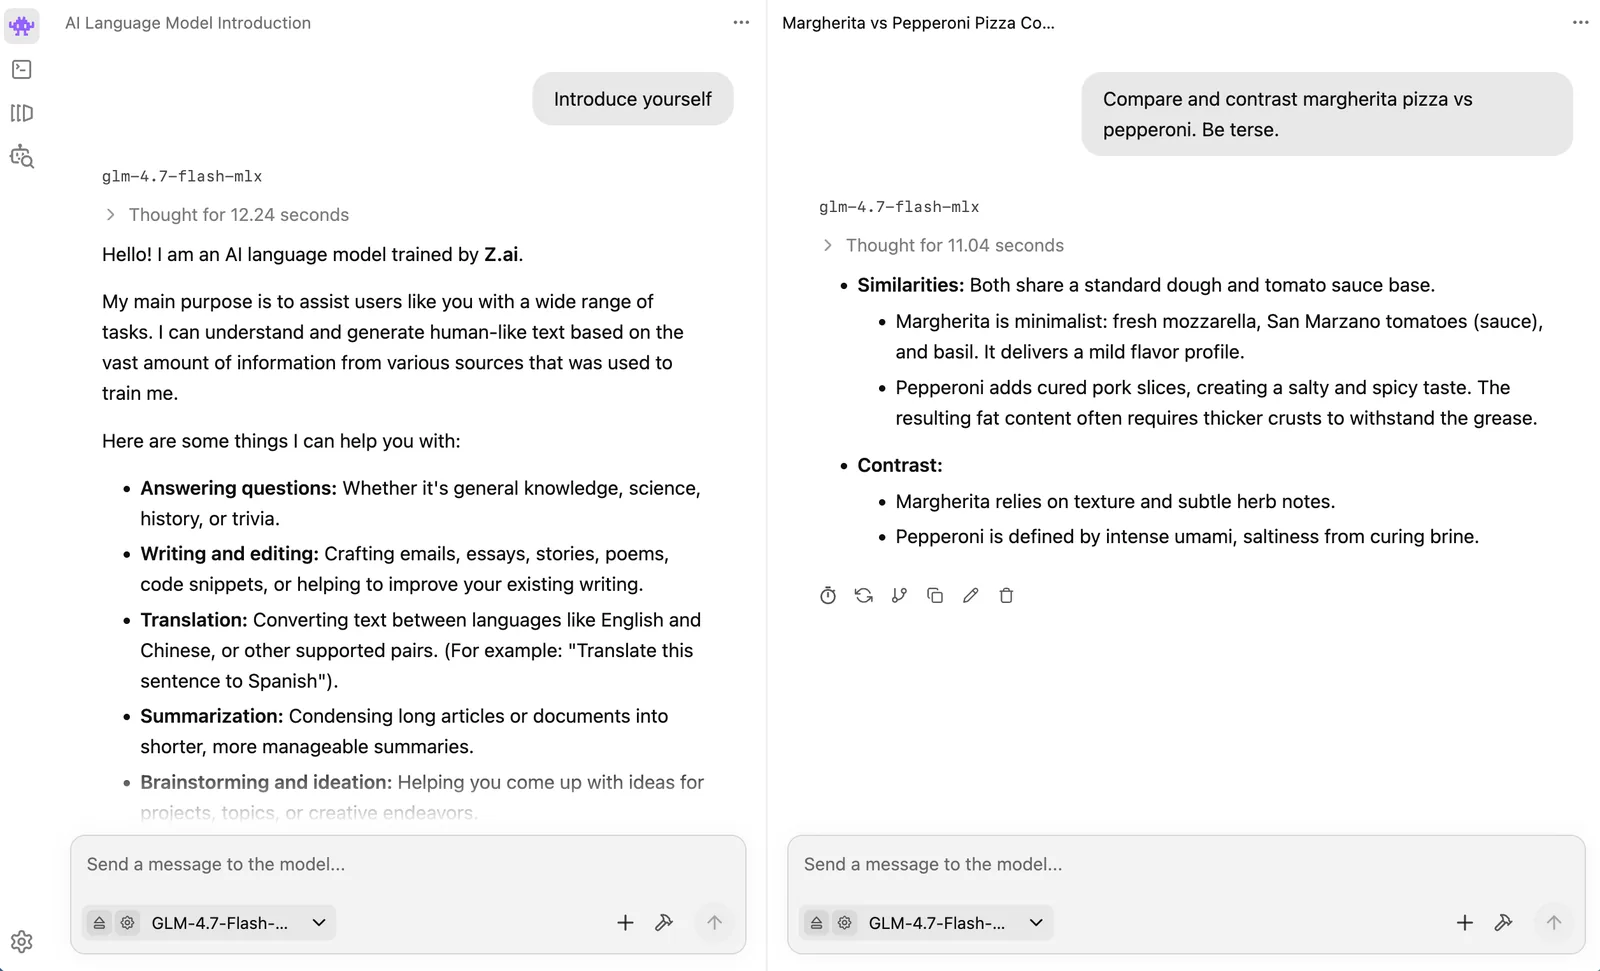

Two conversations side by side in LM Studio, each with its own message box and model picker.
Two things are worth finding early. The second chat pane, shown above, lets you put the same question to two models and compare the answers directly. The load settings, reached from the picker, control how much of the model goes to your graphics card and how much text it can hold in one conversation.
Turn On Your Graphics Card
LM Studio finds most graphics cards on its own and uses them without being asked. NVIDIA cards are used through CUDA, recent AMD cards through ROCm, and most other hardware through Vulkan. If your card was detected, answers arrive several times faster than on the processor alone and you do not have to do anything.
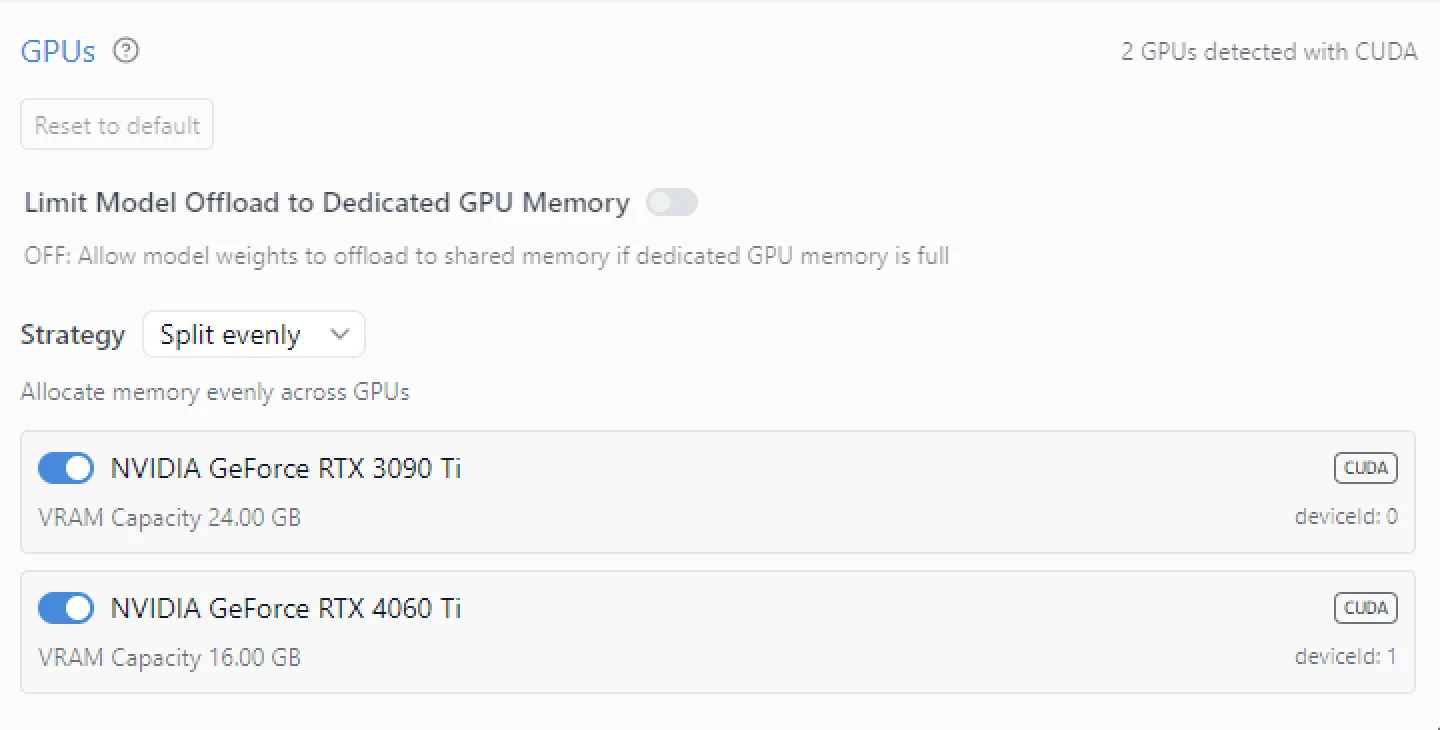

The GPU panel, listing each detected card with its memory and how the work is shared between them.
The panel above shows what the app found, and it is where you check rather than guess. If your card is missing from the list, the usual cause on Ubuntu is a missing or mismatched driver rather than anything in LM Studio, and installing the recommended driver through Additional Drivers fixes it. Press Ctrl+Shift+R to open the runtime manager, which is where the CUDA, ROCm and Vulkan engines are listed and can be updated separately from the app.
A card is not required. Small models run on the processor alone at a readable speed, and the app will simply use it if there is nothing better available.
Use It From Other Apps
LM Studio can answer requests from other programs on your machine. Turn on the local server in the developer section of the sidebar and it listens on http://localhost:1234.
What it speaks there is the same interface OpenAI’s API uses, at /v1/chat/completions and the addresses beside it. Anything built to talk to that API can talk to LM Studio instead, usually by changing one setting from OpenAI’s address to yours. Editors, note taking apps, scripts and browser extensions all work this way, and the text never leaves your computer.
If you want the chat to live in a browser tab rather than an application window, with accounts for several people on the same machine, Open WebUI connects to this server the same way it connects to anything else. Point it at http://localhost:1234/v1 and your LM Studio models appear in its list.
The Terminal Part, If You Want It
You can ignore this section entirely. Nothing above needs it, and the app is complete without it.
LM Studio comes with a command called lms, installed alongside the app. It lists your models, loads and unloads them, and starts and stops the server, which is handy in a script or over SSH:
mike@ubuntu:~$ lms ls          # models you have downloaded

mike@ubuntu:~$ lms ps          # models currently loaded in memory

mike@ubuntu:~$ lms server start # start the local server

mike@ubuntu:~$ lms --help      # everything else
Open LM Studio once before you try it. The command is installed with the app but only put on your path after the application has run for the first time, so a fresh install answers “command not found” until you have opened the window once.
There is a separate headless build called llmster for servers with no graphical session, installed with a one-line script and run as a systemd service. That is a different job from this guide, but it is the answer if you want the same models on a box in a cupboard.
If you are comfortable in the terminal and want the models managed from there instead, Ollama is the tool most Linux users reach for, and it runs happily on the same machine as LM Studio.
When It Will Not Start
Three things account for most of it, and the first two only affect the AppImage.
dlopen(): error loading libfuse.so.2
FIX Install the library the AppImage format expects: sudo apt install libfuse2t64
Ubuntu moved to a newer version of this library and no longer installs the older one that AppImages are built against. It affects every AppImage on the system, not only this one, and installing it alongside changes nothing else. On Ubuntu 22.04 the package is called libfuse2 without the suffix. The .deb does not go near any of this.
The SUID sandbox helper binary was found, but is not configured correctly
FIX Start it once with ./LM-Studio-*.AppImage --no-sandbox to confirm that is the cause.
Recent Ubuntu restricts the feature this application’s window layer uses to isolate itself, so it refuses to start rather than running unprotected. The flag above turns that isolation off, which is fine for a quick look and not what you want permanently. The better answer is the .deb, which installs a system-wide launcher that is allowed to use the sandbox properly, so nothing has to be switched off.
The model fails to load, or the machine crawls
FIX Load a smaller model, and lower the context length in the load settings.
A model has to fit in memory to run. When it nearly fits, Ubuntu starts swapping to disk and everything becomes slow rather than failing outright, which is why this looks like a broken machine instead of a wrong choice. The context length setting is the quiet culprit: a long context reserves a lot of extra memory before a single word is generated. Drop to a 4-bit version of the same model, or one size smaller, and it will load.
Remove It Cleanly
Your models are not in the application, so removing the app leaves several gigabytes behind. That is deliberate, and it means a reinstall keeps everything you downloaded, but it is worth knowing if you are clearing space.
Find the package name first, because it is easier than guessing at the capitalisation, then remove it:
mike@ubuntu:~$ dpkg -l | grep -i lm-studio

mike@ubuntu:~$ sudo apt remove lm-studio
Use whatever name the first command prints in the second one. If you used the AppImage, delete the file and there is nothing else to undo.
Everything else lives in one folder in your home directory, including your downloaded models, your chats and the lms command itself:
mike@ubuntu:~$ du -sh ~/.lmstudio

14G     /home/mike/.lmstudio

mike@ubuntu:~$ rm -rf ~/.lmstudio
Check the size first, as above, so you know what you are about to delete. That second command cannot be undone and every model you downloaded goes with it, so leave the folder in place if you think you might come back.
Helpful Resources
Frequently Asked Questions
Is LM Studio free, and is it open source?
It is free to download and use, with no account and no paid tier for what this guide covers. It is not open source: the application itself is proprietary, which sets it apart from the models it runs and from most of the local AI tools on Linux. The models are the usual public ones under their own licences, and everything stays on your machine either way.
Can I use LM Studio at work?
Yes. LM Studio is free for commercial and workplace use, with no form to fill in and no separate licence to request. That changed in July 2025, so older guides telling you to email for permission are out of date.
Can LM Studio use the models I already downloaded with Ollama?
Not in practice. Ollama stores its models as unnamed blocks of data with checksum filenames, and LM Studio expects ordinary .gguf files, so there is nothing straightforward to point it at. Download the model again inside LM Studio, which takes a few minutes and leaves your Ollama setup untouched. Both can sit on the same machine.
Do I need a graphics card to run LM Studio?
No. Models run on the processor, and a small one answers at a readable speed on an ordinary laptop. A graphics card makes it several times faster and lets you run larger models, and LM Studio uses one automatically if it finds it: CUDA for NVIDIA, ROCm for recent AMD cards, Vulkan for most of the rest.
Should I download the .deb or the AppImage?
Take the .deb on an Intel or AMD machine. It adds LM Studio to your applications menu, starts like any other program, and avoids the two launch errors the AppImage format can hit on recent Ubuntu. The AppImage is useful for trying the app without installing it, and it is the only option on ARM machines, where no .deb is offered.
Where does LM Studio keep its models?
In ~/.lmstudio in your home directory, alongside your chats and settings. You can point it at another drive from the app’s settings if your home partition is small, which is worth doing before you download several models. Removing the application does not remove this folder.
A desktop app that finds the models, downloads them, and runs them on your own machine.
Related guides: Install Llama on Ubuntu · Install Mistral on Ubuntu · Install DeepSeek Harness on Ubuntu · More AI guides for Ubuntu