Hello everyone, today you will learn how to install software using Ubuntu Software Center, before you do that, let me ask, how are you all doing today? I hope you are all having a great afternoon so far. Today we had some temporarily server issues which caused some of you not to be able to access our site but I logged in my Linux server about 30 minutes ago and I have solved an issue. Something went wrong with my MySQL so I had to tweak some settings and restart the MySQL server, and so far the load is fine, sorry for any issues this caused! Anyway, please read on…
Today will mark the start of what I am now calling ‘Tutorial Month’, from now until November 21st 2019. We will be releasing tutorials each week, we will start with tutorials targeted towards Linux/Ubuntu beginners and then we will move on to the advanced Ubuntu guides and tutorials later on. I think you will love these tutorials. The first tutorial we have has been submitted by Daniel Chakraborty, expect more articles from him. Hopefully he joins our staff as a writer! Let’s begin.
Installing Applications On The Ubuntu Software Center
Compared to any other Linux distribution, Ubuntu boasts of offering software that is useful for everyday computing as well as developers.
Given that you’ve just graduated from Windows, Ubuntu is probably the perfect place to begin. It’s simple and user-friendly.
Both when it comes to installation as well as the applications that can be used in place of those available on Windows.
Which begs the question: how does one get to install software on their system on which you have installed Ubuntu.
But before we answer that question, let’s look at some alternatives that Ubuntu offers as software to what you might have been used to when working with Windows.
The Ubiquitous Ubuntu Wallpaper
 Original Ubuntu Wallpaper
6 Types of Applications That Are Available When You Install Ubuntu
Assuming that you are a beginner, you might also have a number of tasks that you carry about on a daily basis.
Each of these applications, for example Microsoft Word, has a substitute in Ubuntu. It might be heartening to know that each of these applications have just as many features as those in Windows did.
So, let’s look at a few applications that are available under broad categories in Ubuntu itself.
#1: Office Suite
The most popular option that will easily replace Microsoft Office is LibreOffice that consists of Writer, Calc, Draw, Impress and Math. Constituents that are not very different from Microsoft Word, Excel and Powerpoint.
In fact, it gives you the option of saving files both in *.odt as well as in .doc and .docx formats so that you can use the latter on a Windows system.
#2: Internet Browsers
While Chrome, Firefox, Opera and Safari are the most commonly used browsers over the internet, Ubuntu offers these browsers and so much more. It must be pointed out that while you will not get the last two, there are other alternatives such as the Slimjet and the Epiphany web browsers too.
#3: Graphics Editors
You’ve probably heard of both CorelDraw and Adobe Photoshop. If not, there’s no doubt that you’ve used Paint at some point of time at least to edit photos. No differently, there are a number of applications that you can use with Ubuntu that helps you with basic photo viewing and editing tasks.
The most popular option is GIMP, which stands for GNU Image Manipulation Program that can perform both simple as well as specialized tasks. Given the variety that is available, you can easily find a number of image viewers that aren’t as specialized as GIMP.
#4: Text Editors
If you are a writer, then using a text editor is vital for a number of tasks. Just like Notepad in Windows, you have a number of text editors available in Ubuntu too. The most popular ones that come to mind include Gedit, Leafpad and Gvim.
#5: Sound & Video
Of course, Windows might have offered Windows Media Player but Ubuntu has the best of the lot: VLC Player.
Without a doubt, you can play all your music using VLC Player. Other options include Rhythmbox Music Player as well as Audacious if for some reason you do not like VLC Player.
#6: File Management
Extracting and archiving files is also a common task that most people would perform. For this, the most popular option includes 7-Zip where you can pack and unpack a number of file formats without a hitch whatsoever. Yes, this includes both RAR and the popular ZIP formats too.
Steps to Installing An Application From The Ubuntu Software Center
[contentblock id=2 img=gcb.png]
As mentioned earlier, Ubuntu is perfect for beginners. Gone are the days when a Linux user could only install a program using the command line.
Ubuntu is so user-friendly when it comes to installing software that all it takes is a few mouse clicks and keyboard entries to do so.
Which brings us to the Ubuntu Software Center that has been around since the release of Ubuntu 12.04 and 12.10 versions of the operating system.
This is how it looks, at first glance, as soon as you load the program:
Yet your first question might be: how do we load this program?
It’s easy as pie. Or so the saying goes.
- Step 1: Click the ‘dash’ icon – the ‘cog’ icon located at the top left hand corner of your screen. You can use the Windows or Super key to do this too. Type ‘software center’ in the Search field provided.
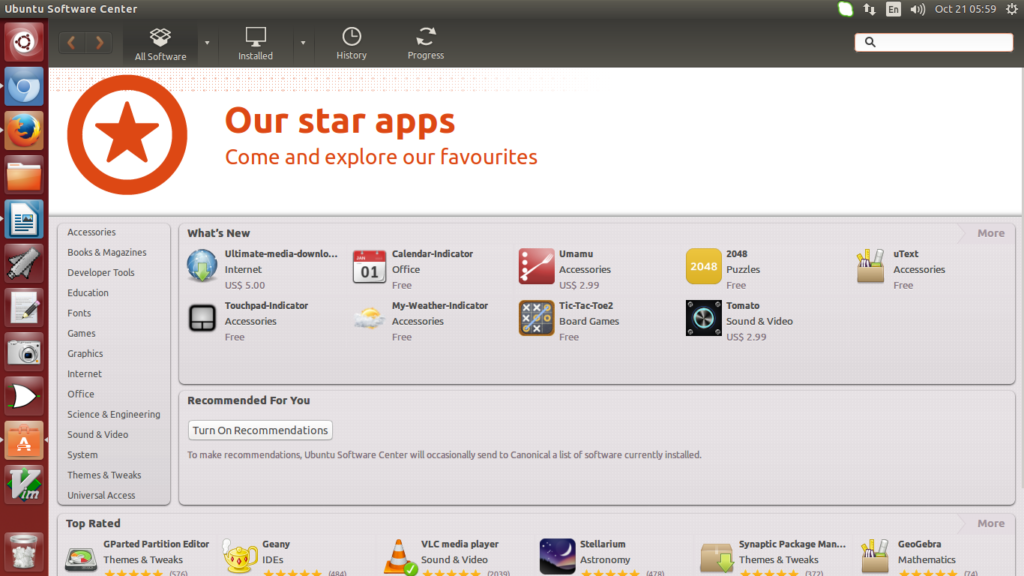 Ubuntu Software Center
- Step 2: Select the orange icon by using your mouse – in other words, using left-click. You will find yourself at the first screen as shown above.
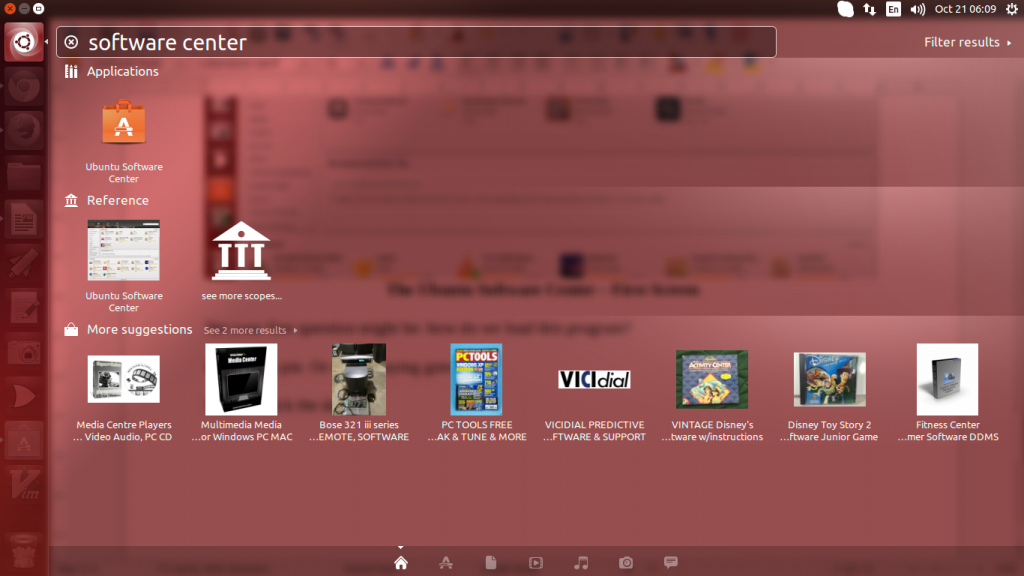 Search Ubuntu Software Center
- Step 3: Now, let’s think of installing a browser. Let’s try Firefox, since it is a familiar application to all. Type ‘firefox’ in the search box provided at the top-right hand corner of the Software Center.
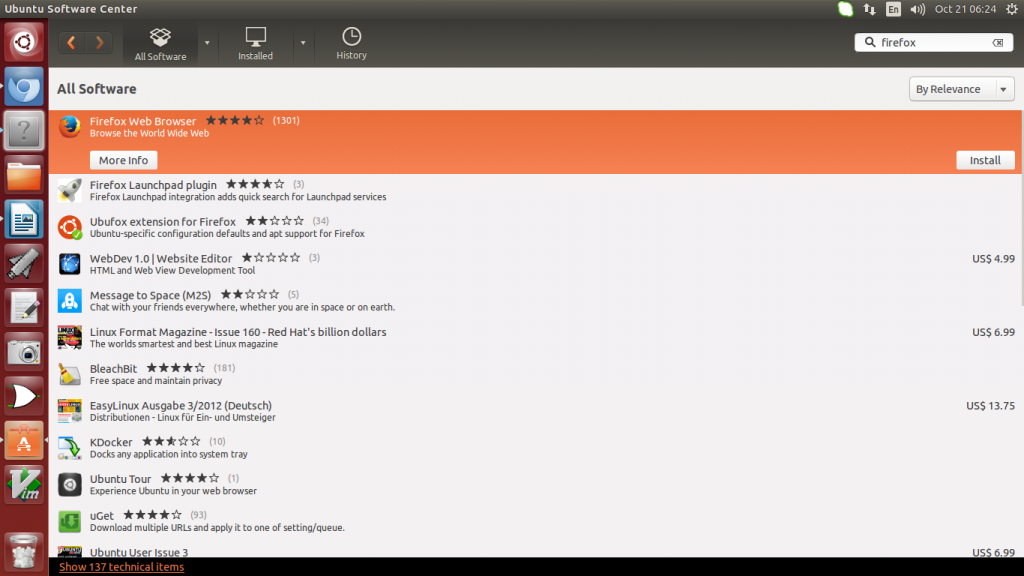 Download FireFox from Ubuntu Software Center
- Step 4: Either double-click the Firefox Web Browser section or click ‘Install’ located to the extreme right of your screen. After this, authenticate this installation by entering your password that you use to log into Ubuntu as shown in the image below.
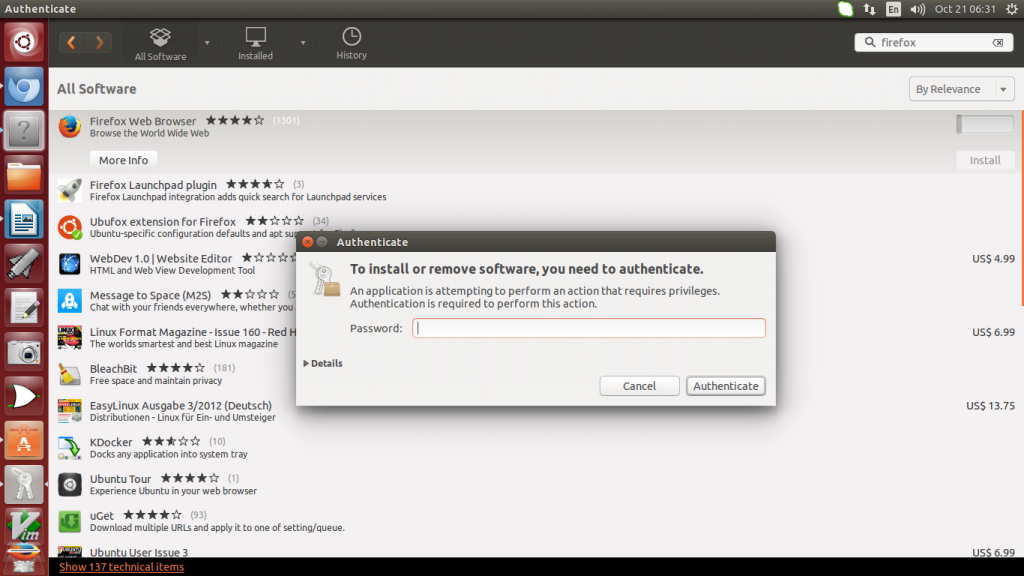 Password for Ubuntu Software Center
Once the installation is complete, you will find Firefox located in the Launcher. Click on the icon to begin browsing. Or either navigate back to the Ubuntu Software Center to install another application. For this, click on the orange briefcase with an ‘A’ that is displayed in the Launcher too. Alternatively, click on the ‘Close’ option within the ‘File’ menu in the top left hand corner to close the Ubuntu Software Center and as shown below:
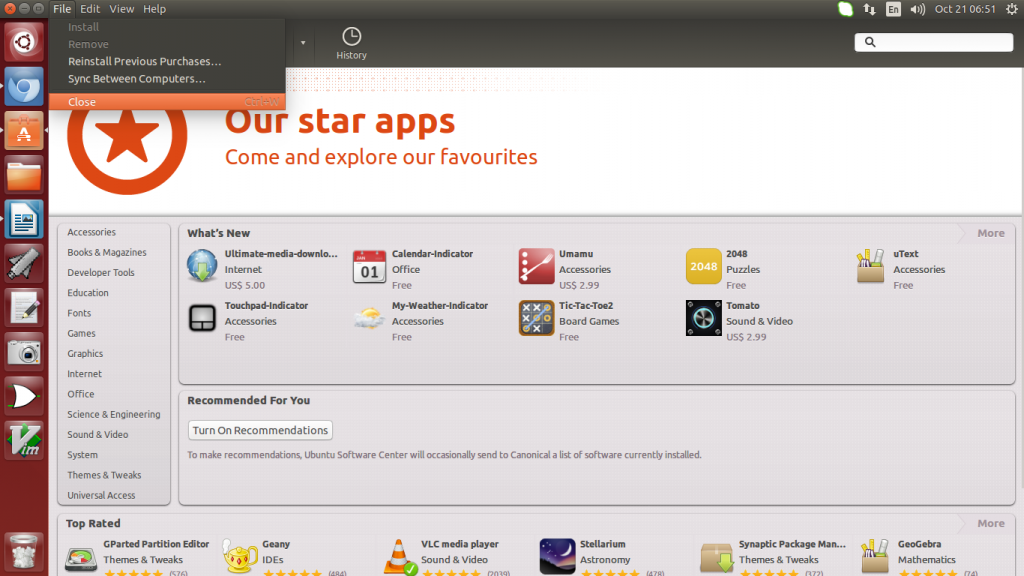 Exit Ubuntu Software Center
Before we’re done here, there’s one last thing to remember. If you find a green tick mark next to the application you wish to install, this means that it has already been installed on your system. You can look for it in the dash and use it immediately.
Also, make sure that the application you wish to install is free of cost. Most of the common applications are but there are others that you will need to pay for.
So, is there anything else you would like to add in regard to installing applications using the Ubuntu Software Center? If so, feel free to share your thoughts in the comments section below, thanks for reading, hope this helped!
Quick Links: Best Ubuntu Antivirus Apps | Best BitTorrent Apps For Ubuntu | Best Video Editing Software On Ubuntu | Top 5 Microsoft Office Alternatives On Ubuntu


